

Things you will need
14″ MDF
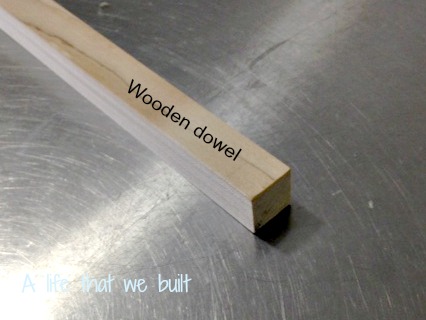
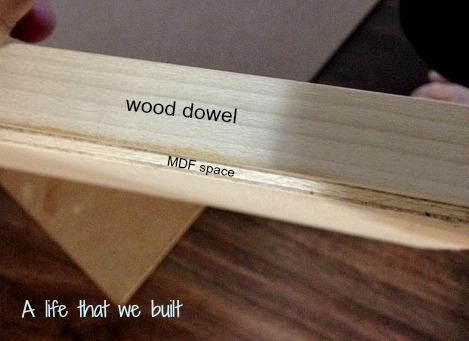
5/8″ square dowels-used for supporting MDF
Trim of choice for hiding the seams
Trim of choice for bottom of cabinets
Paintable wood filler
Painters caulk
Circular saw
Miter saw or plastic miter box and hand saw
Nail gun and appropriate nails, or hammer and appropriate nails
Wall stud finder-(anchors with appropriate screws if needed)
Kitchen Remodel- the space above your kitchen cabinets
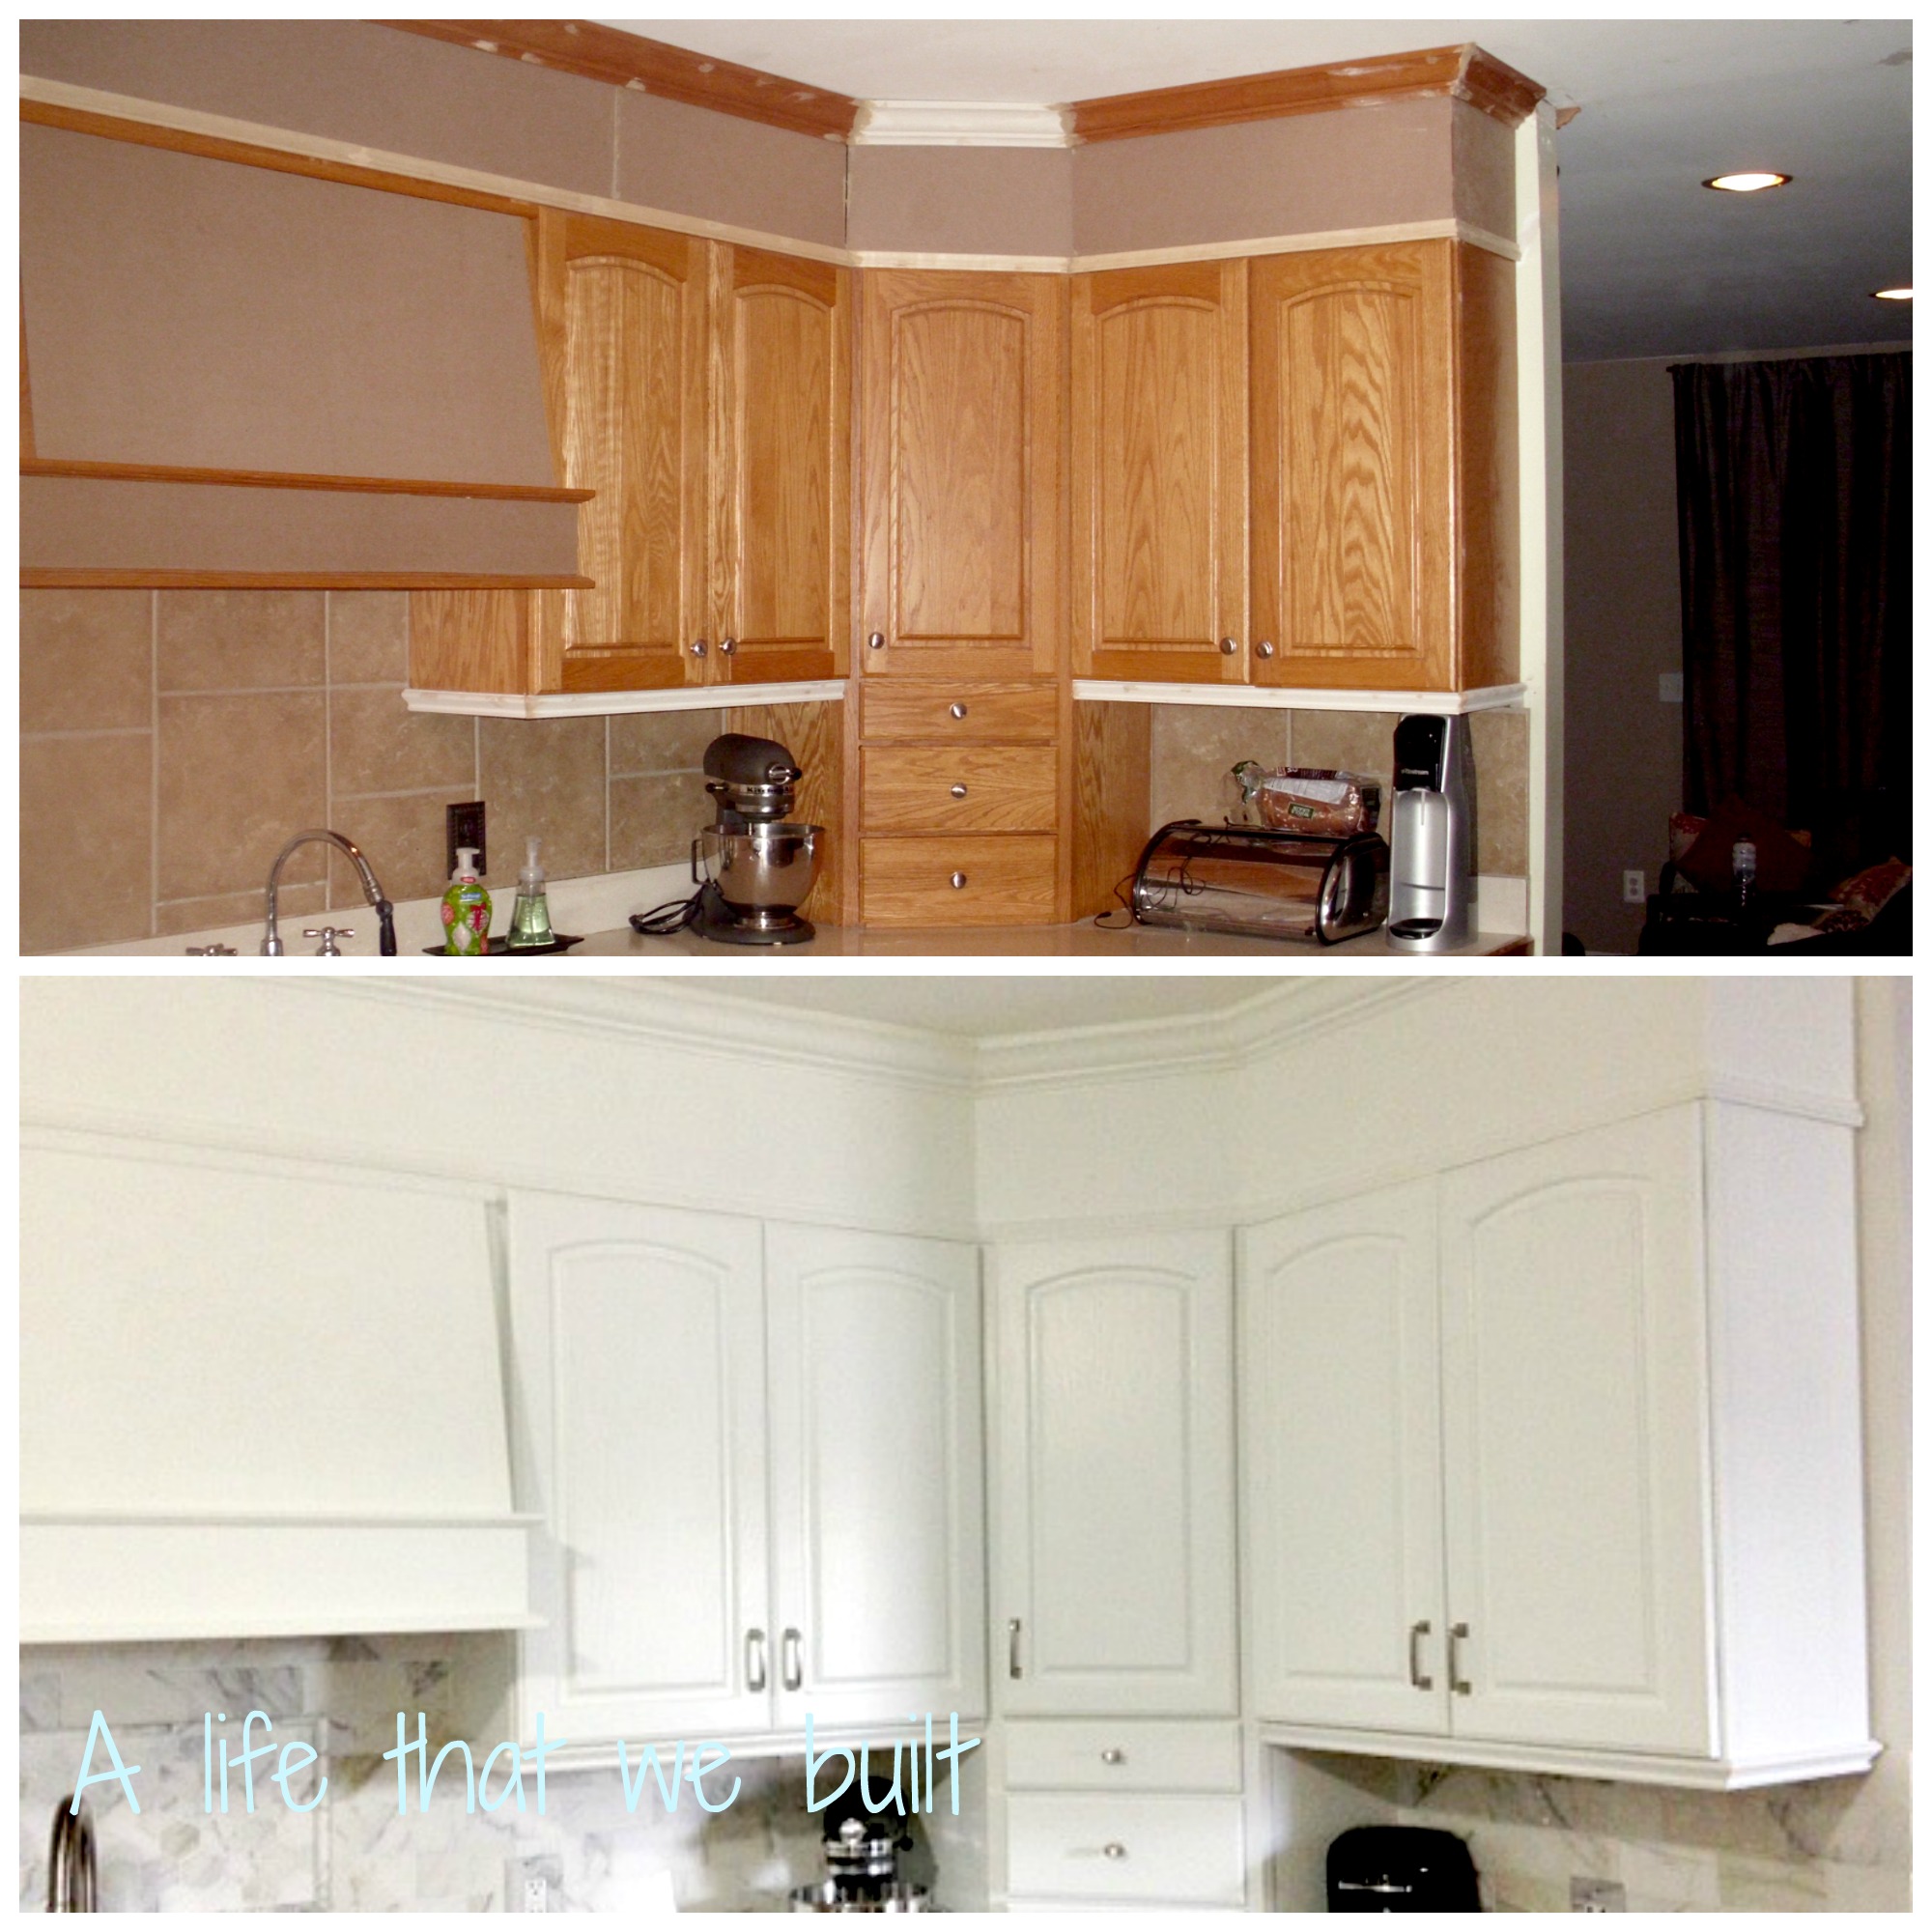
I remember my mother being so excited about her “find” at Handy Andy’s, a hardware store that was going out of business. The store was being liquidated and there was a display kitchen in the store that she wanted. They made a deal and she ended up getting her dream kitchen. The addition to the house was modeled around this kitchen. Kraft maid cabinets with an oak color, even the counter tops were included. I was a kid back then so I did not care much, anything was better than the metal cabinets we used to have. 20 years later, the kitchen needed some updating.
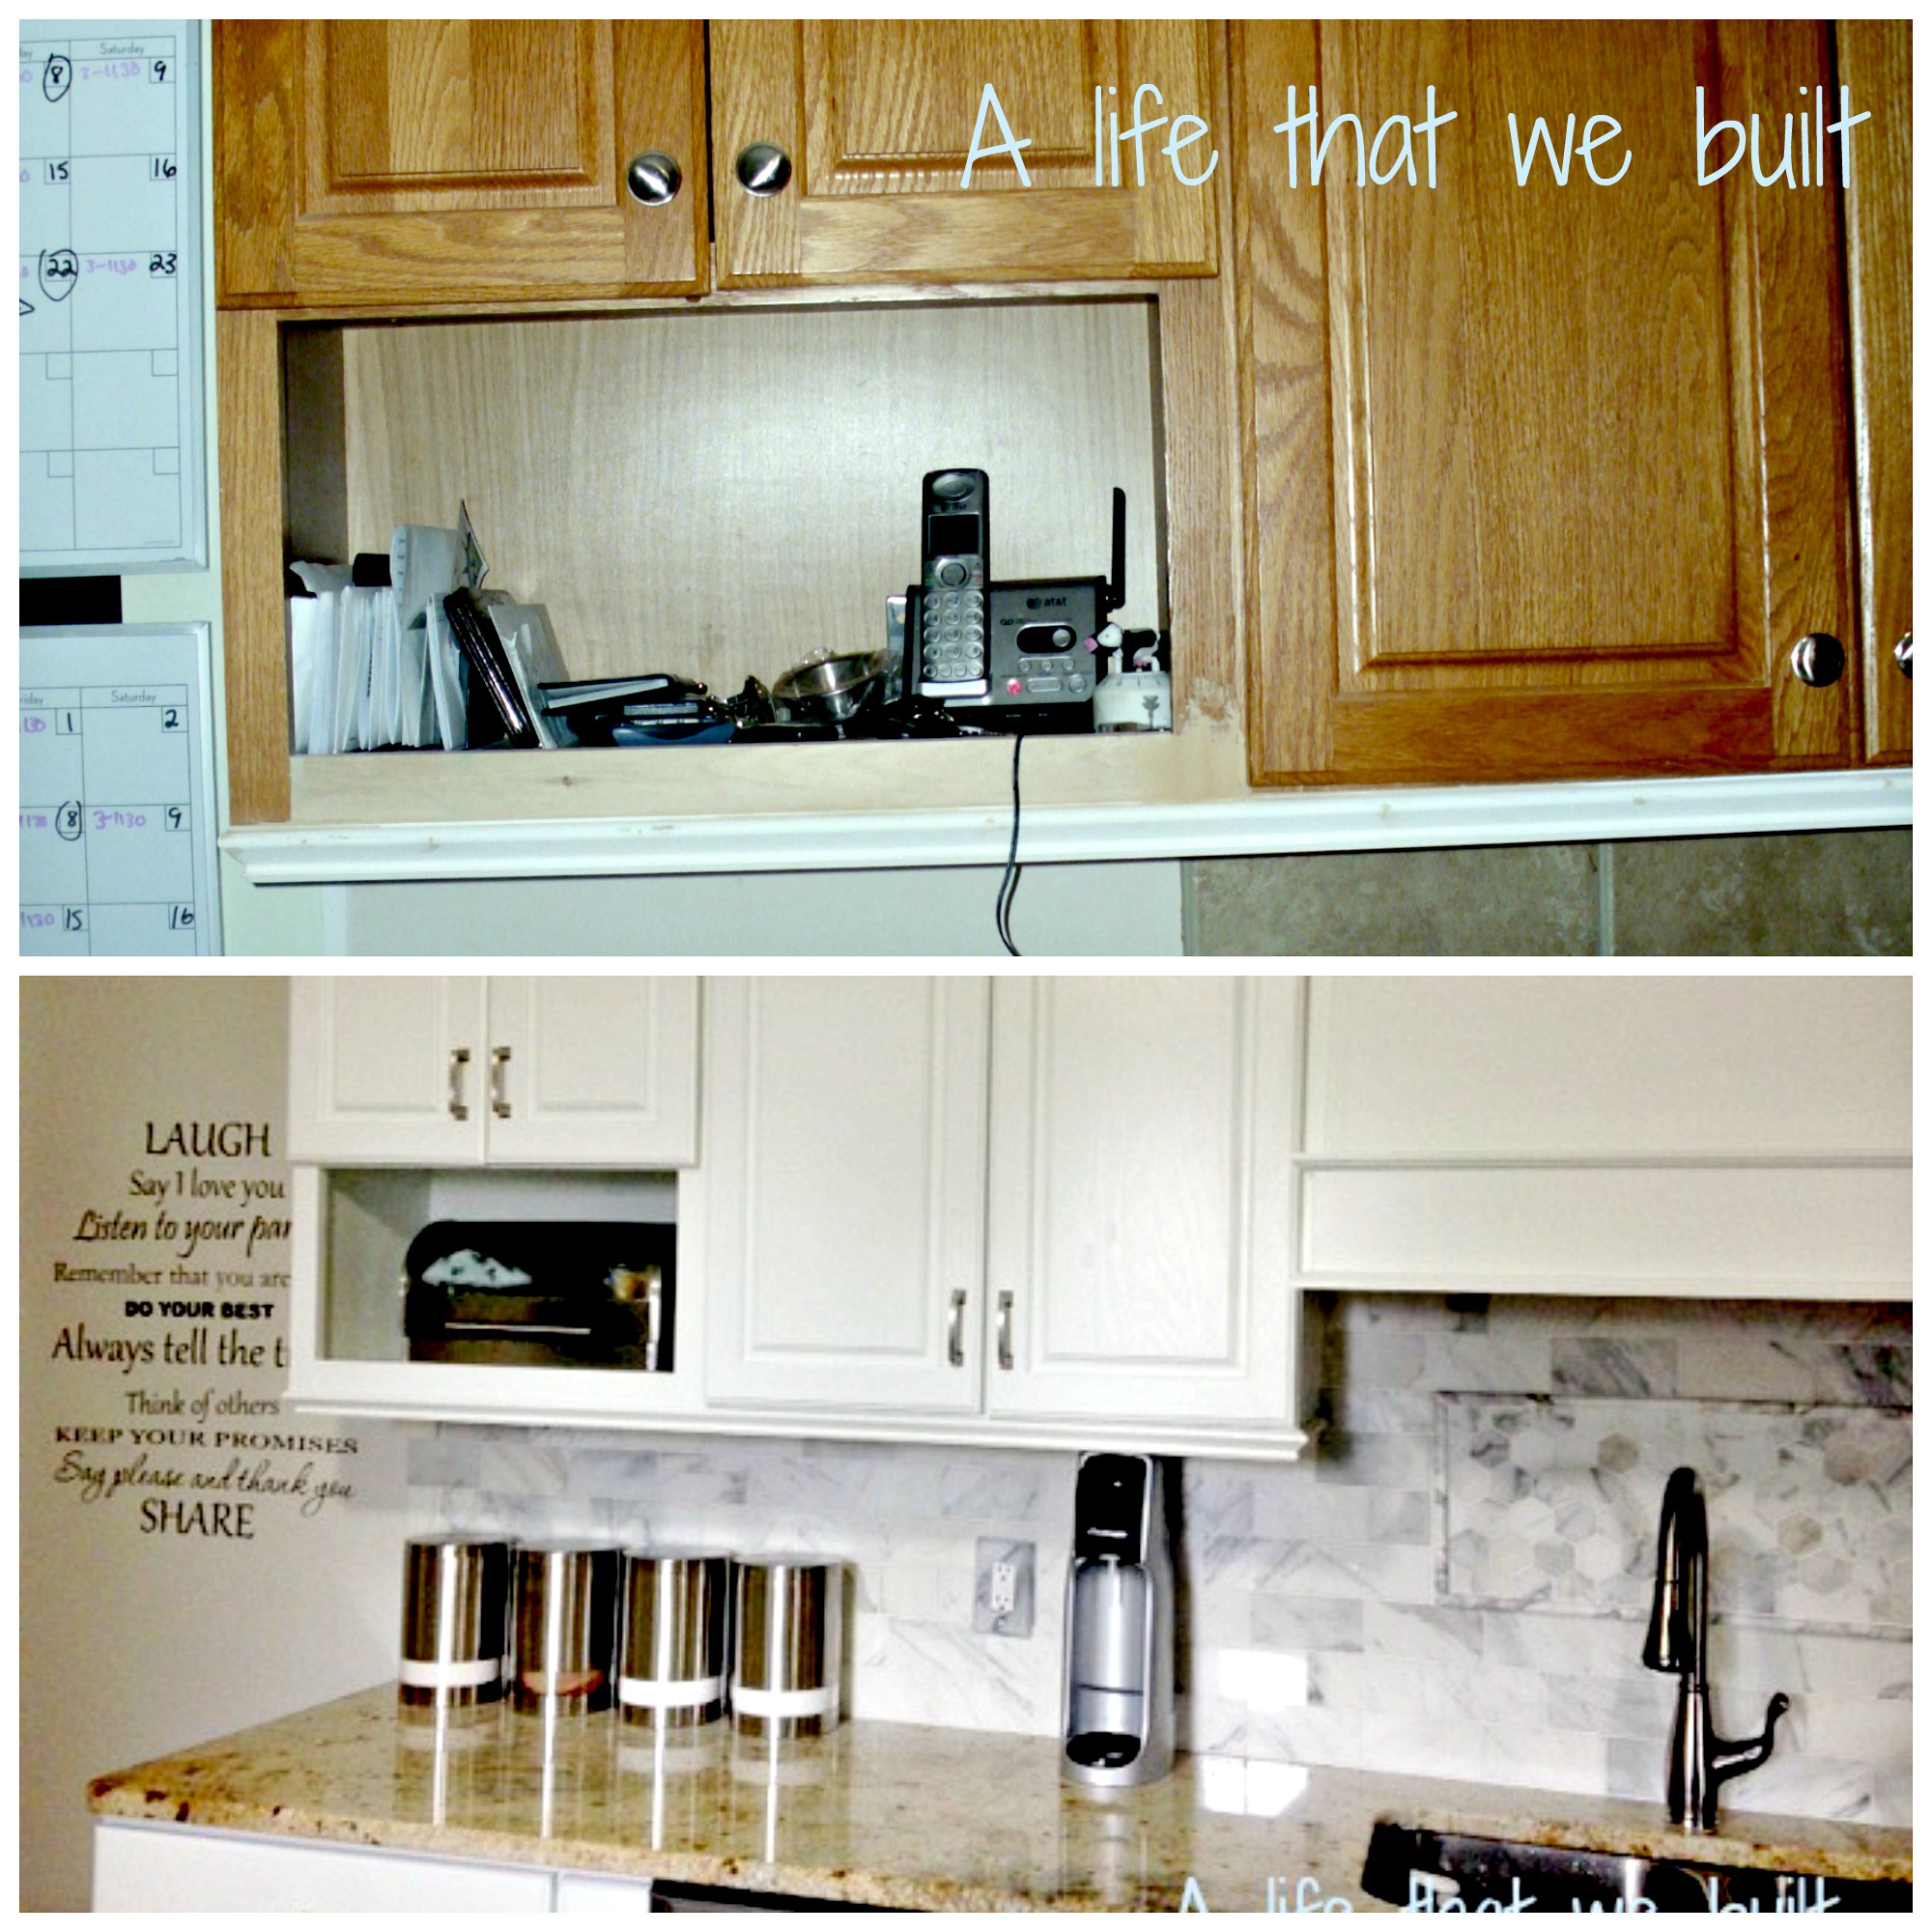
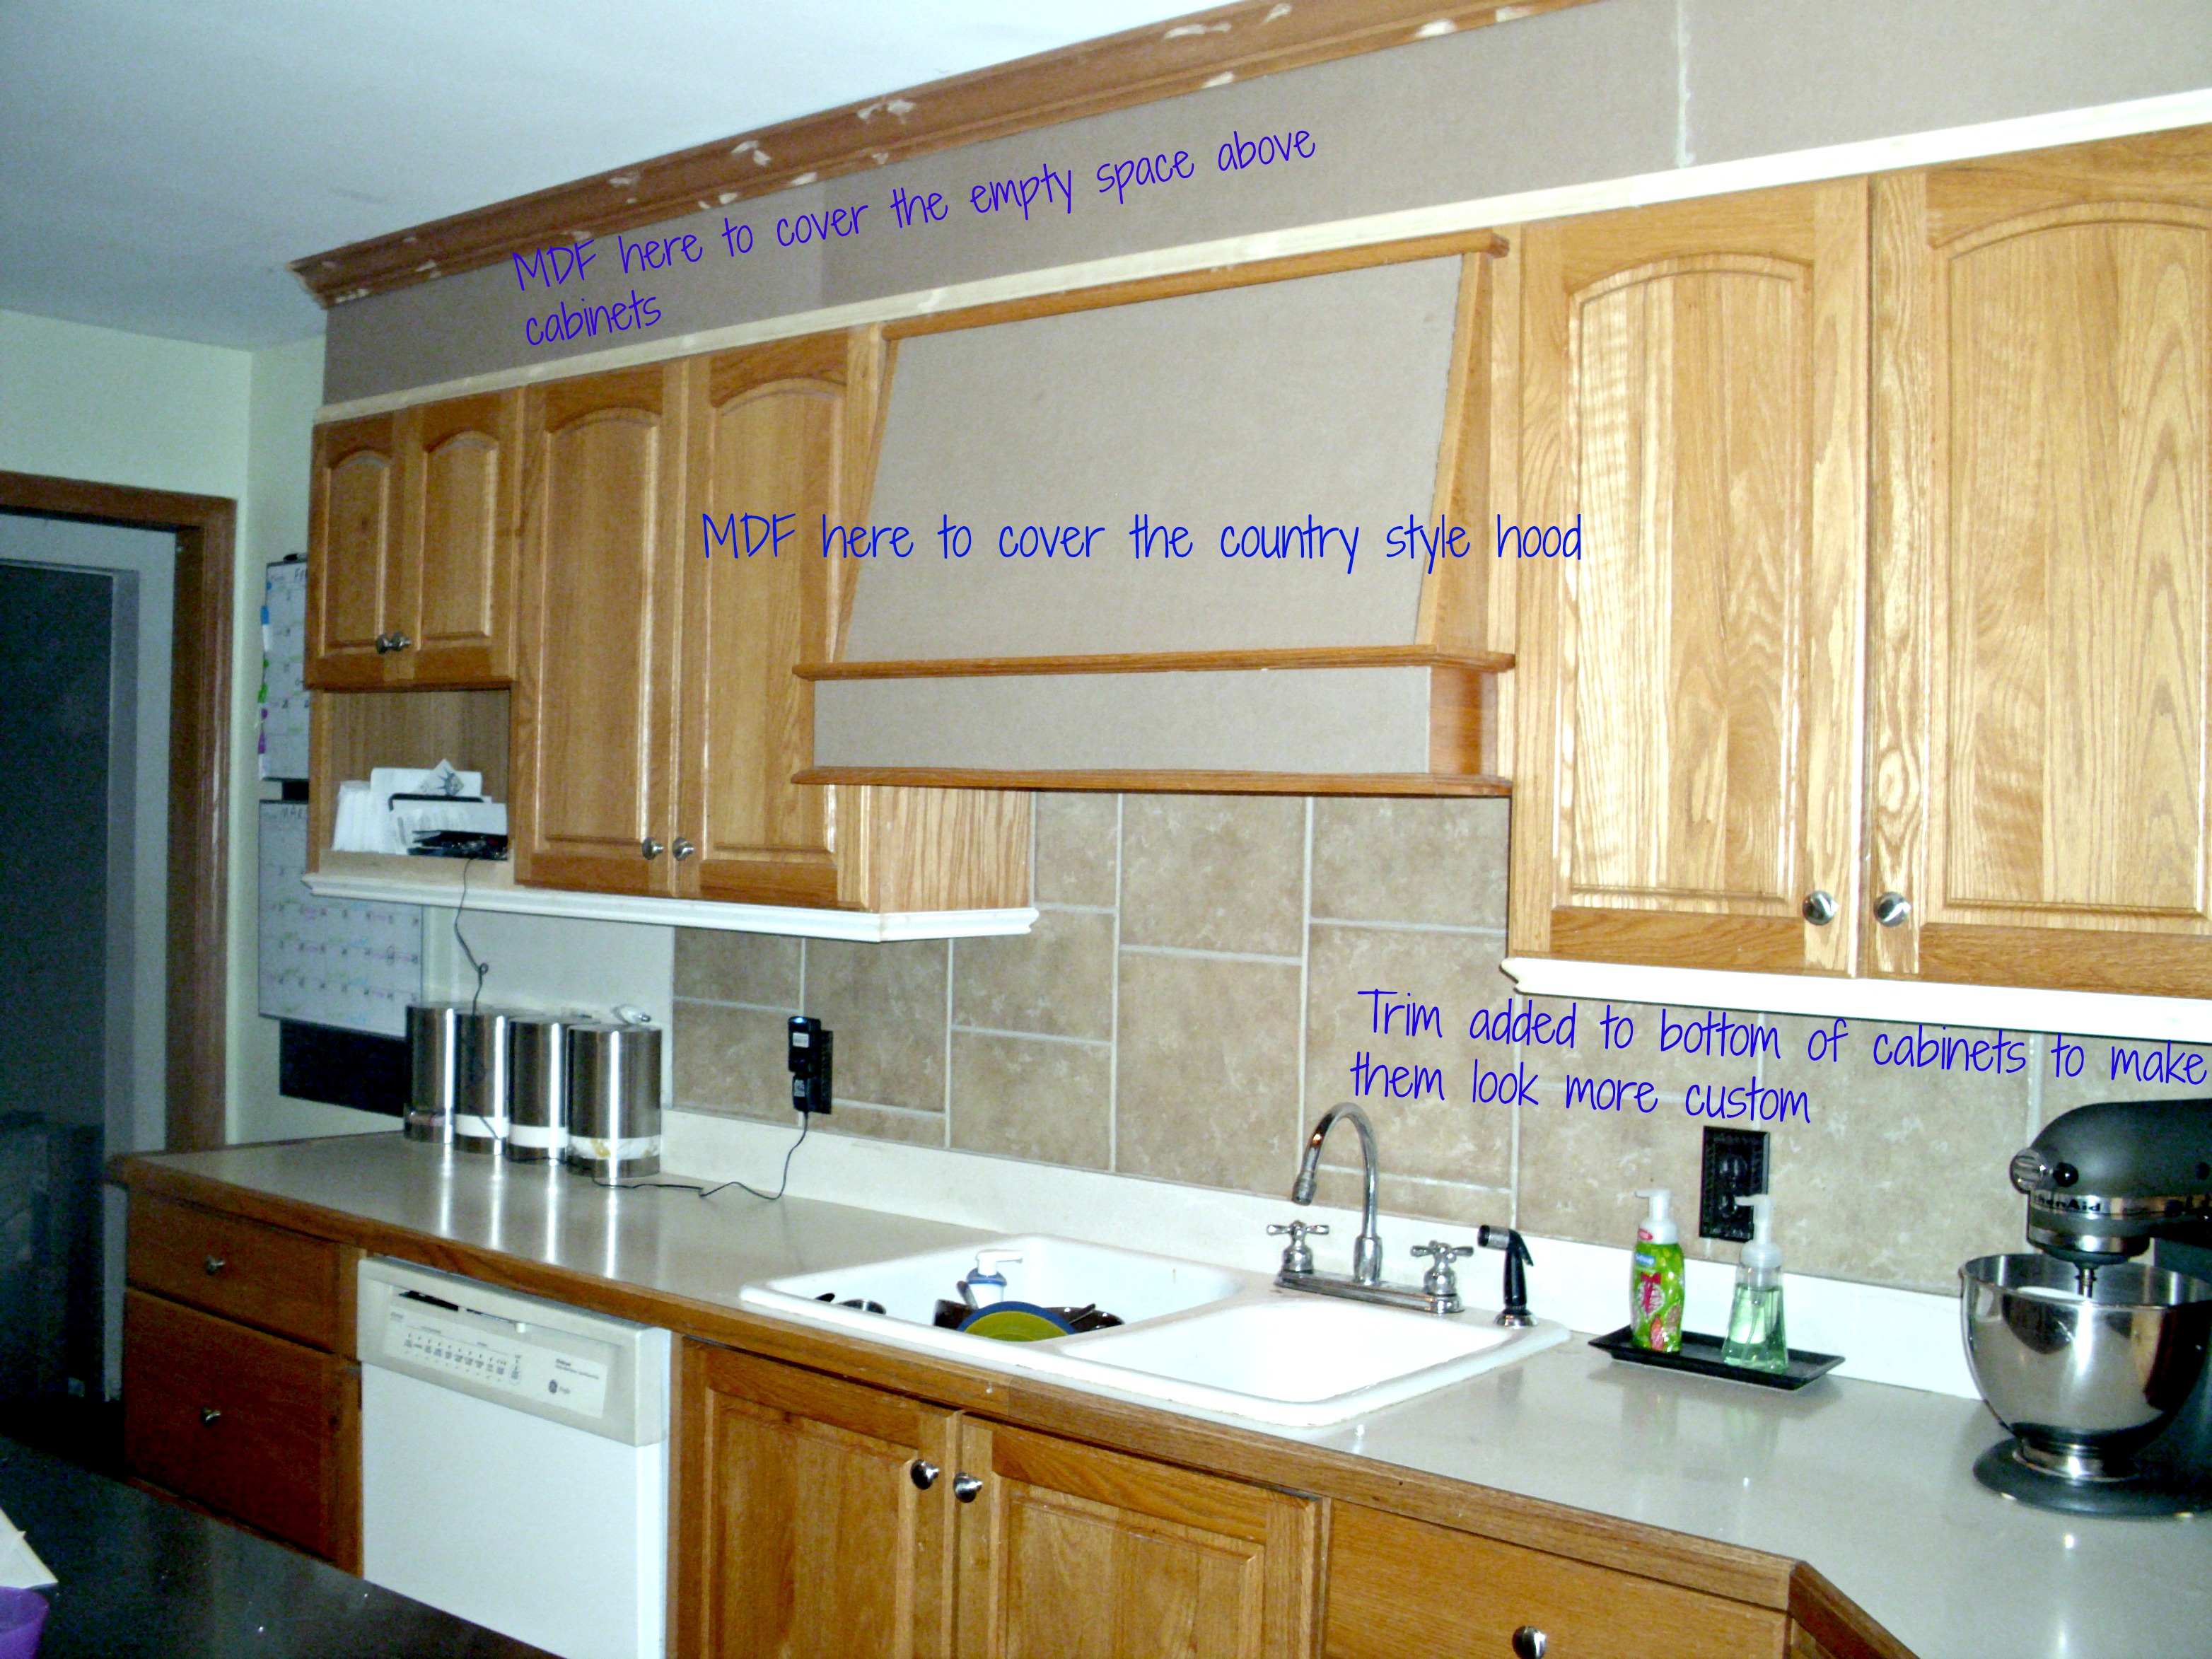
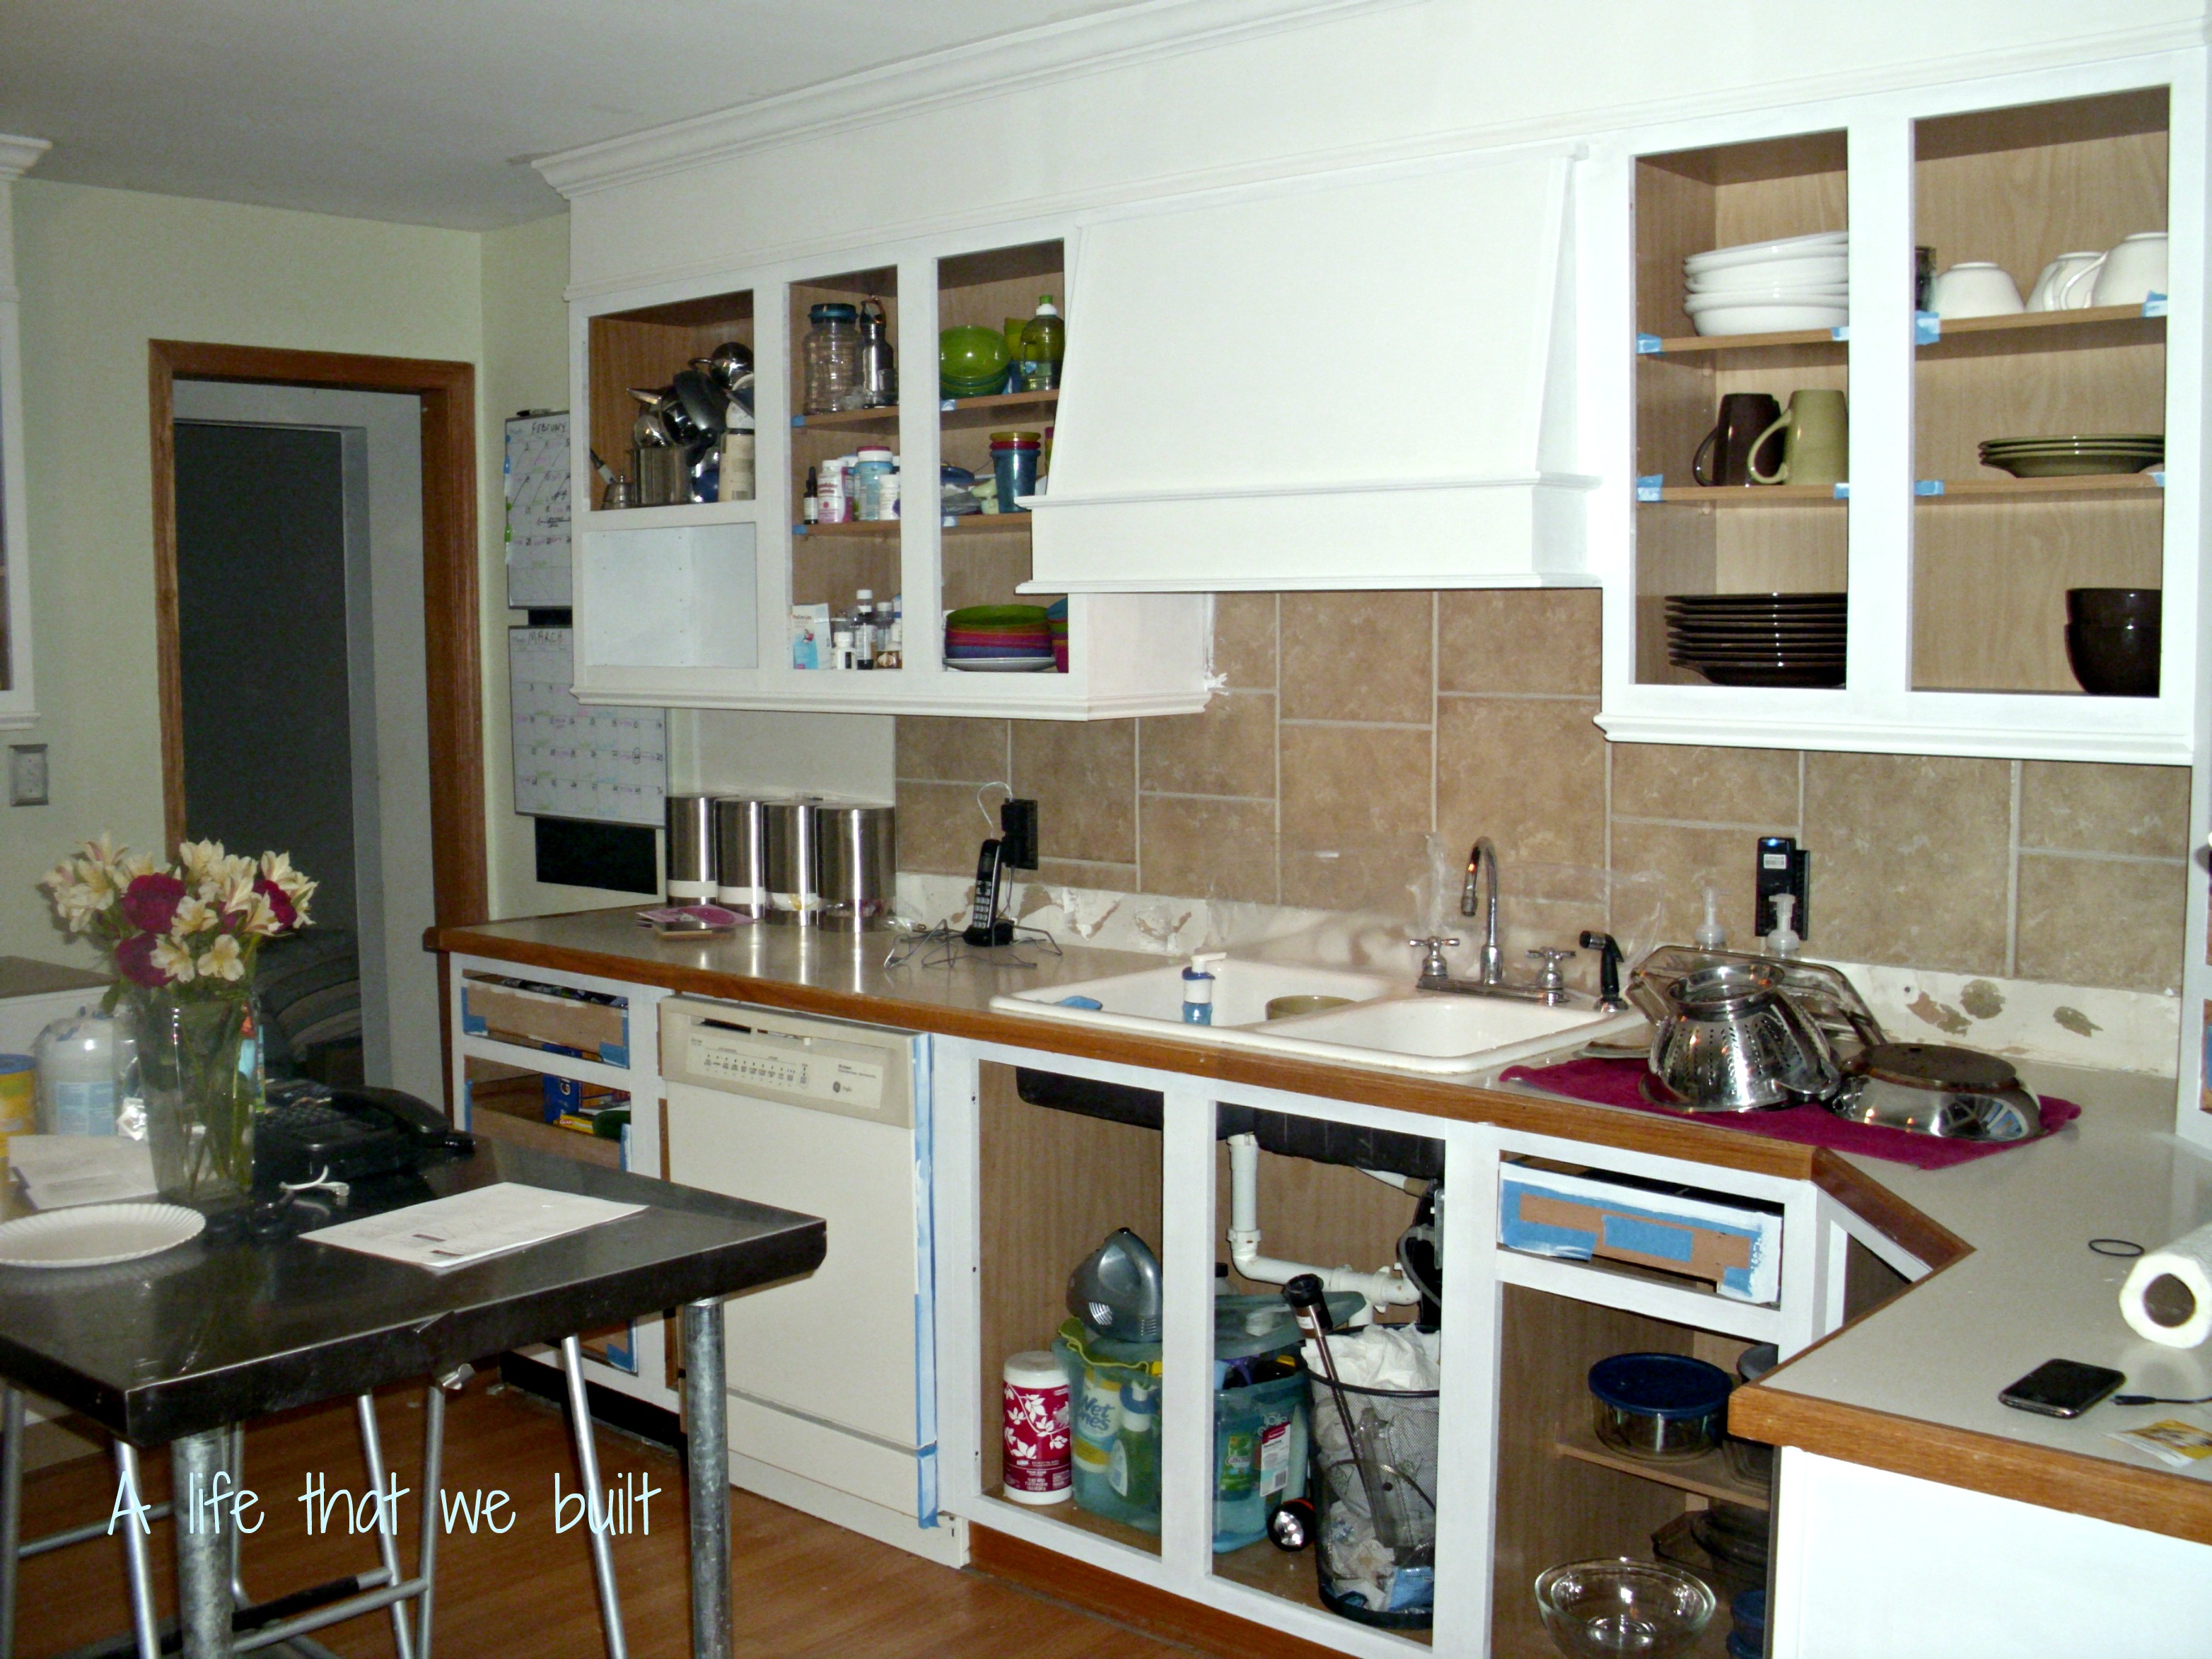
The cabinets were in great shape but there were three things I hated about the kitchen. One, the oak color to the cabinets. Two, the space above the cabinets- what do you do with that anyways?, and Three, the “model” kitchen lacked some cabinets that we desperately needed.
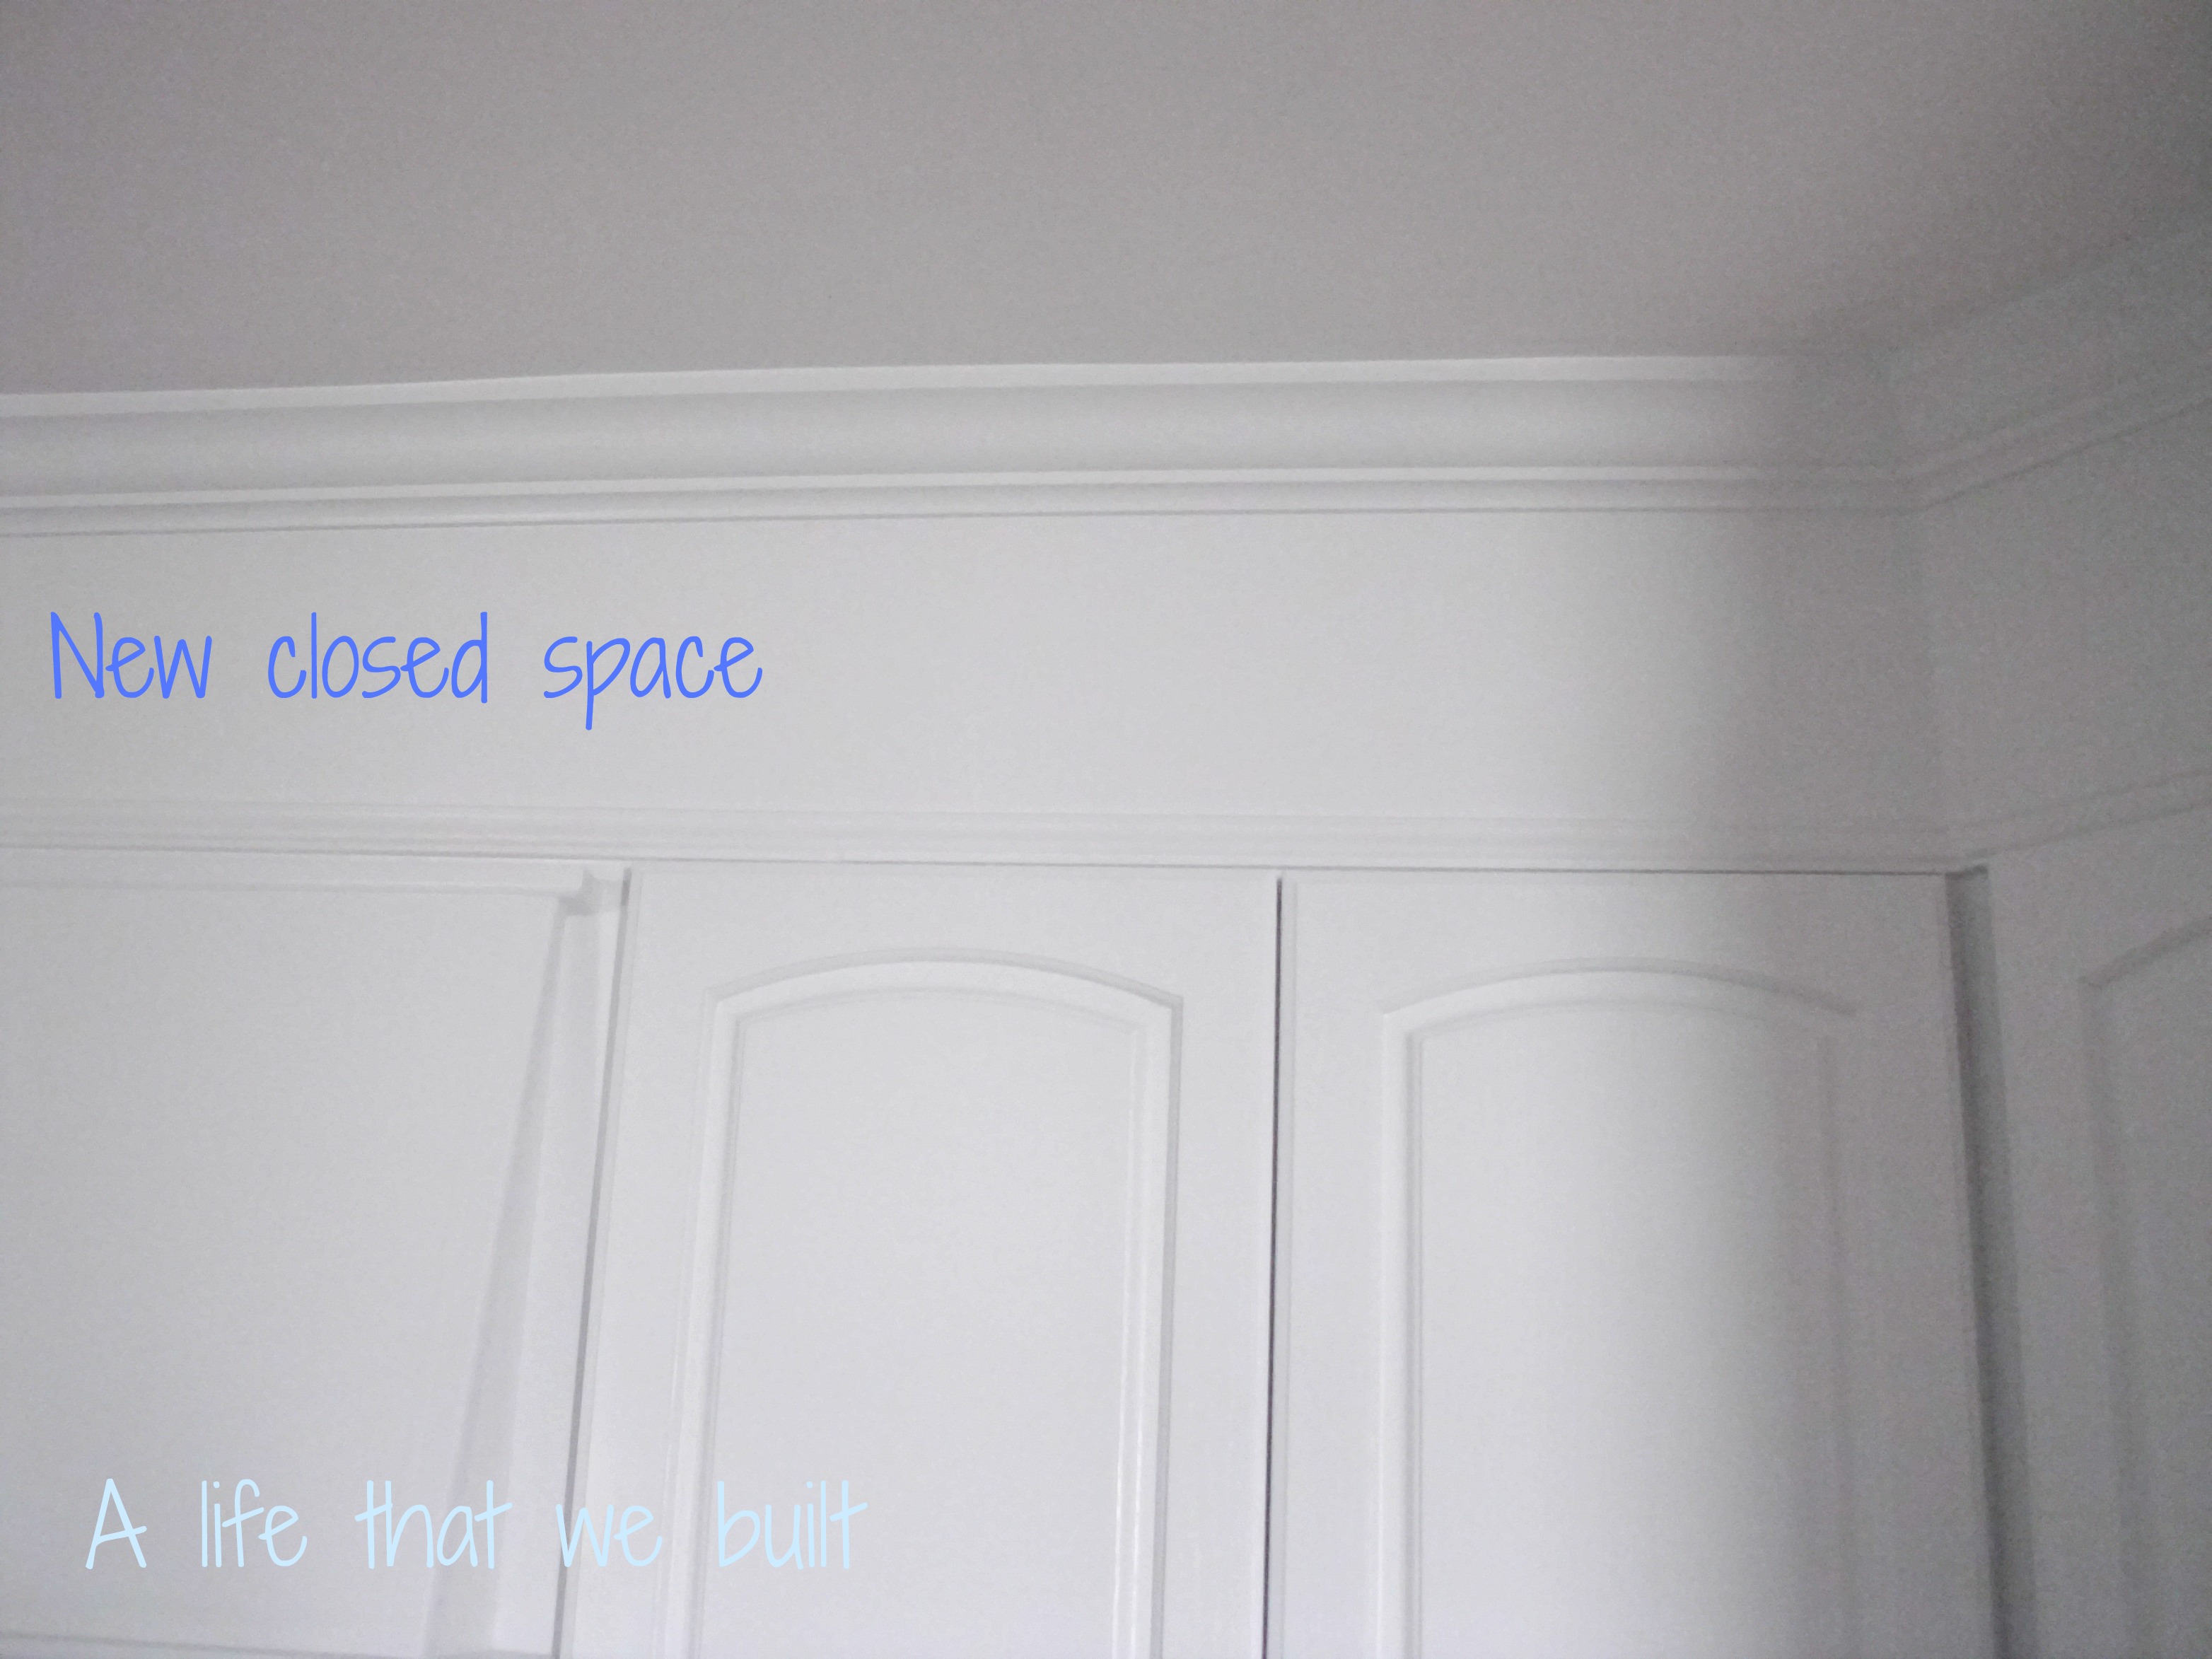
I started wondering how I could close off the space above the cabinets and went to Home Depot to look around in the lumber section. I came across these square dowels and thought if I could attach these to the cabinets and the ceiling, I could use some other material to close off the uppers. I knew at that point I was going to have to paint the cabinets so I wanted something paint friendly. I came across MDF in 14″. It is lightweight and extremely paintable. This would be perfect. I bought some sample pieces and went home to try it out.
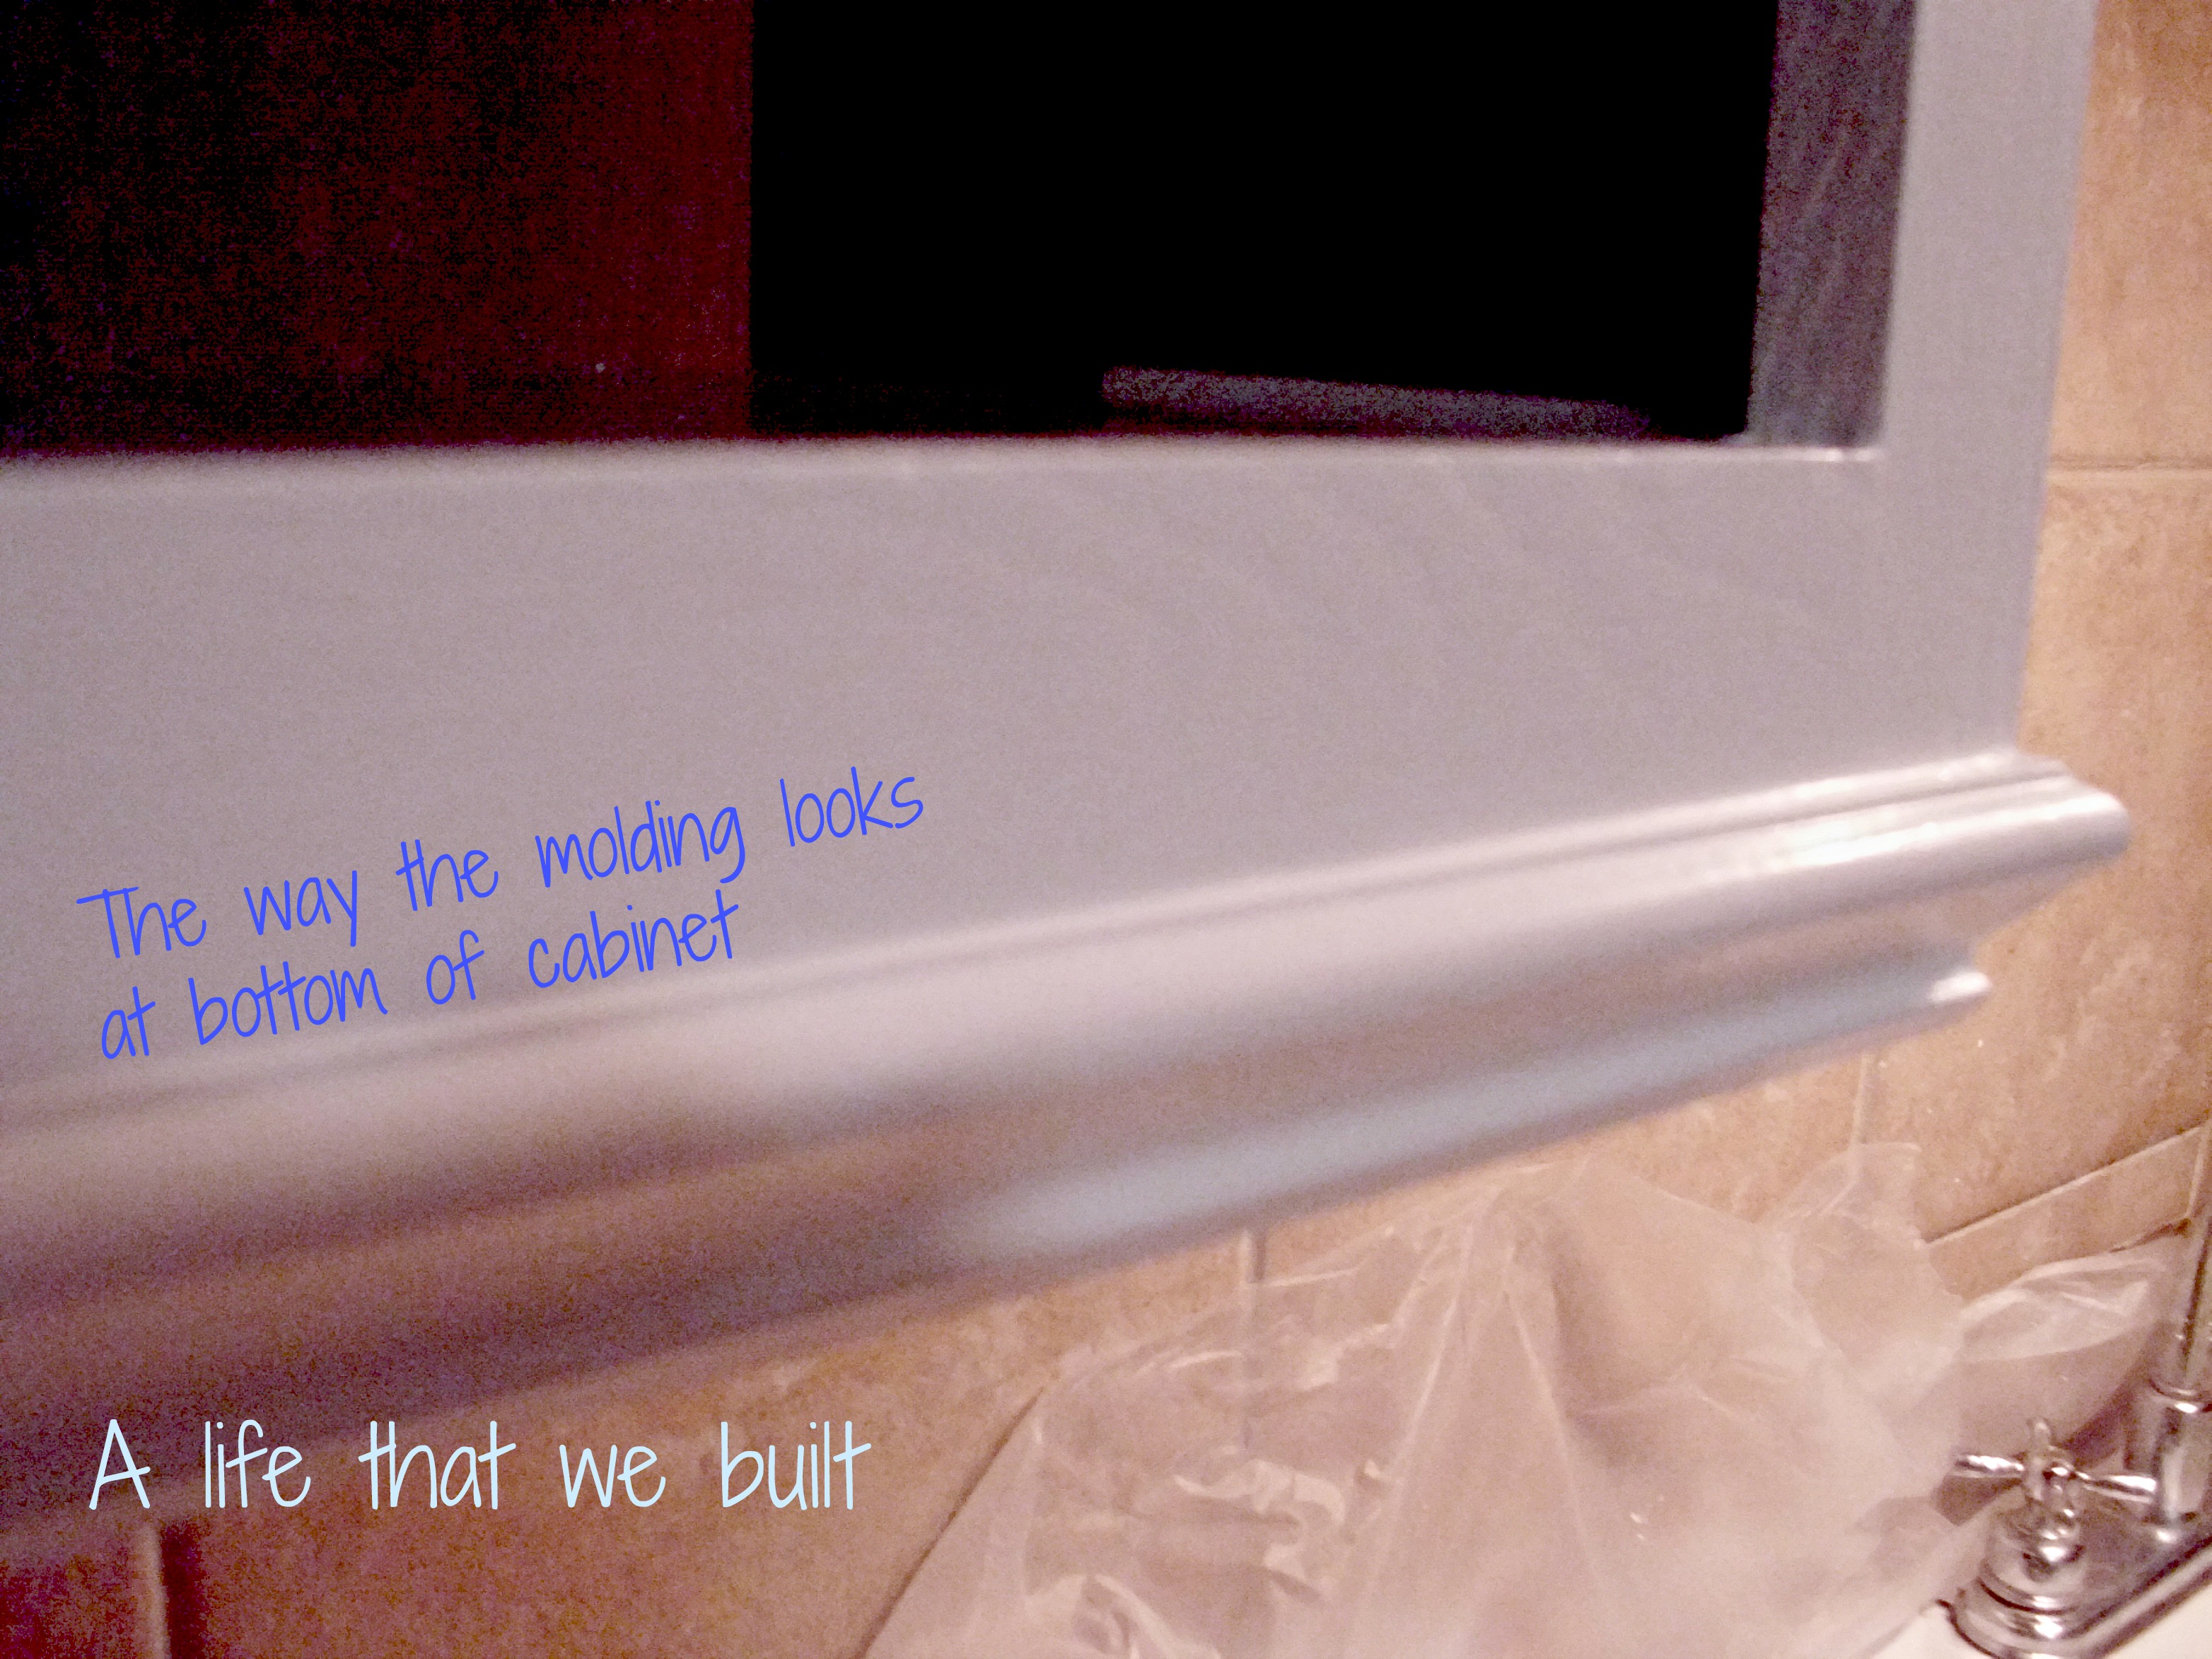
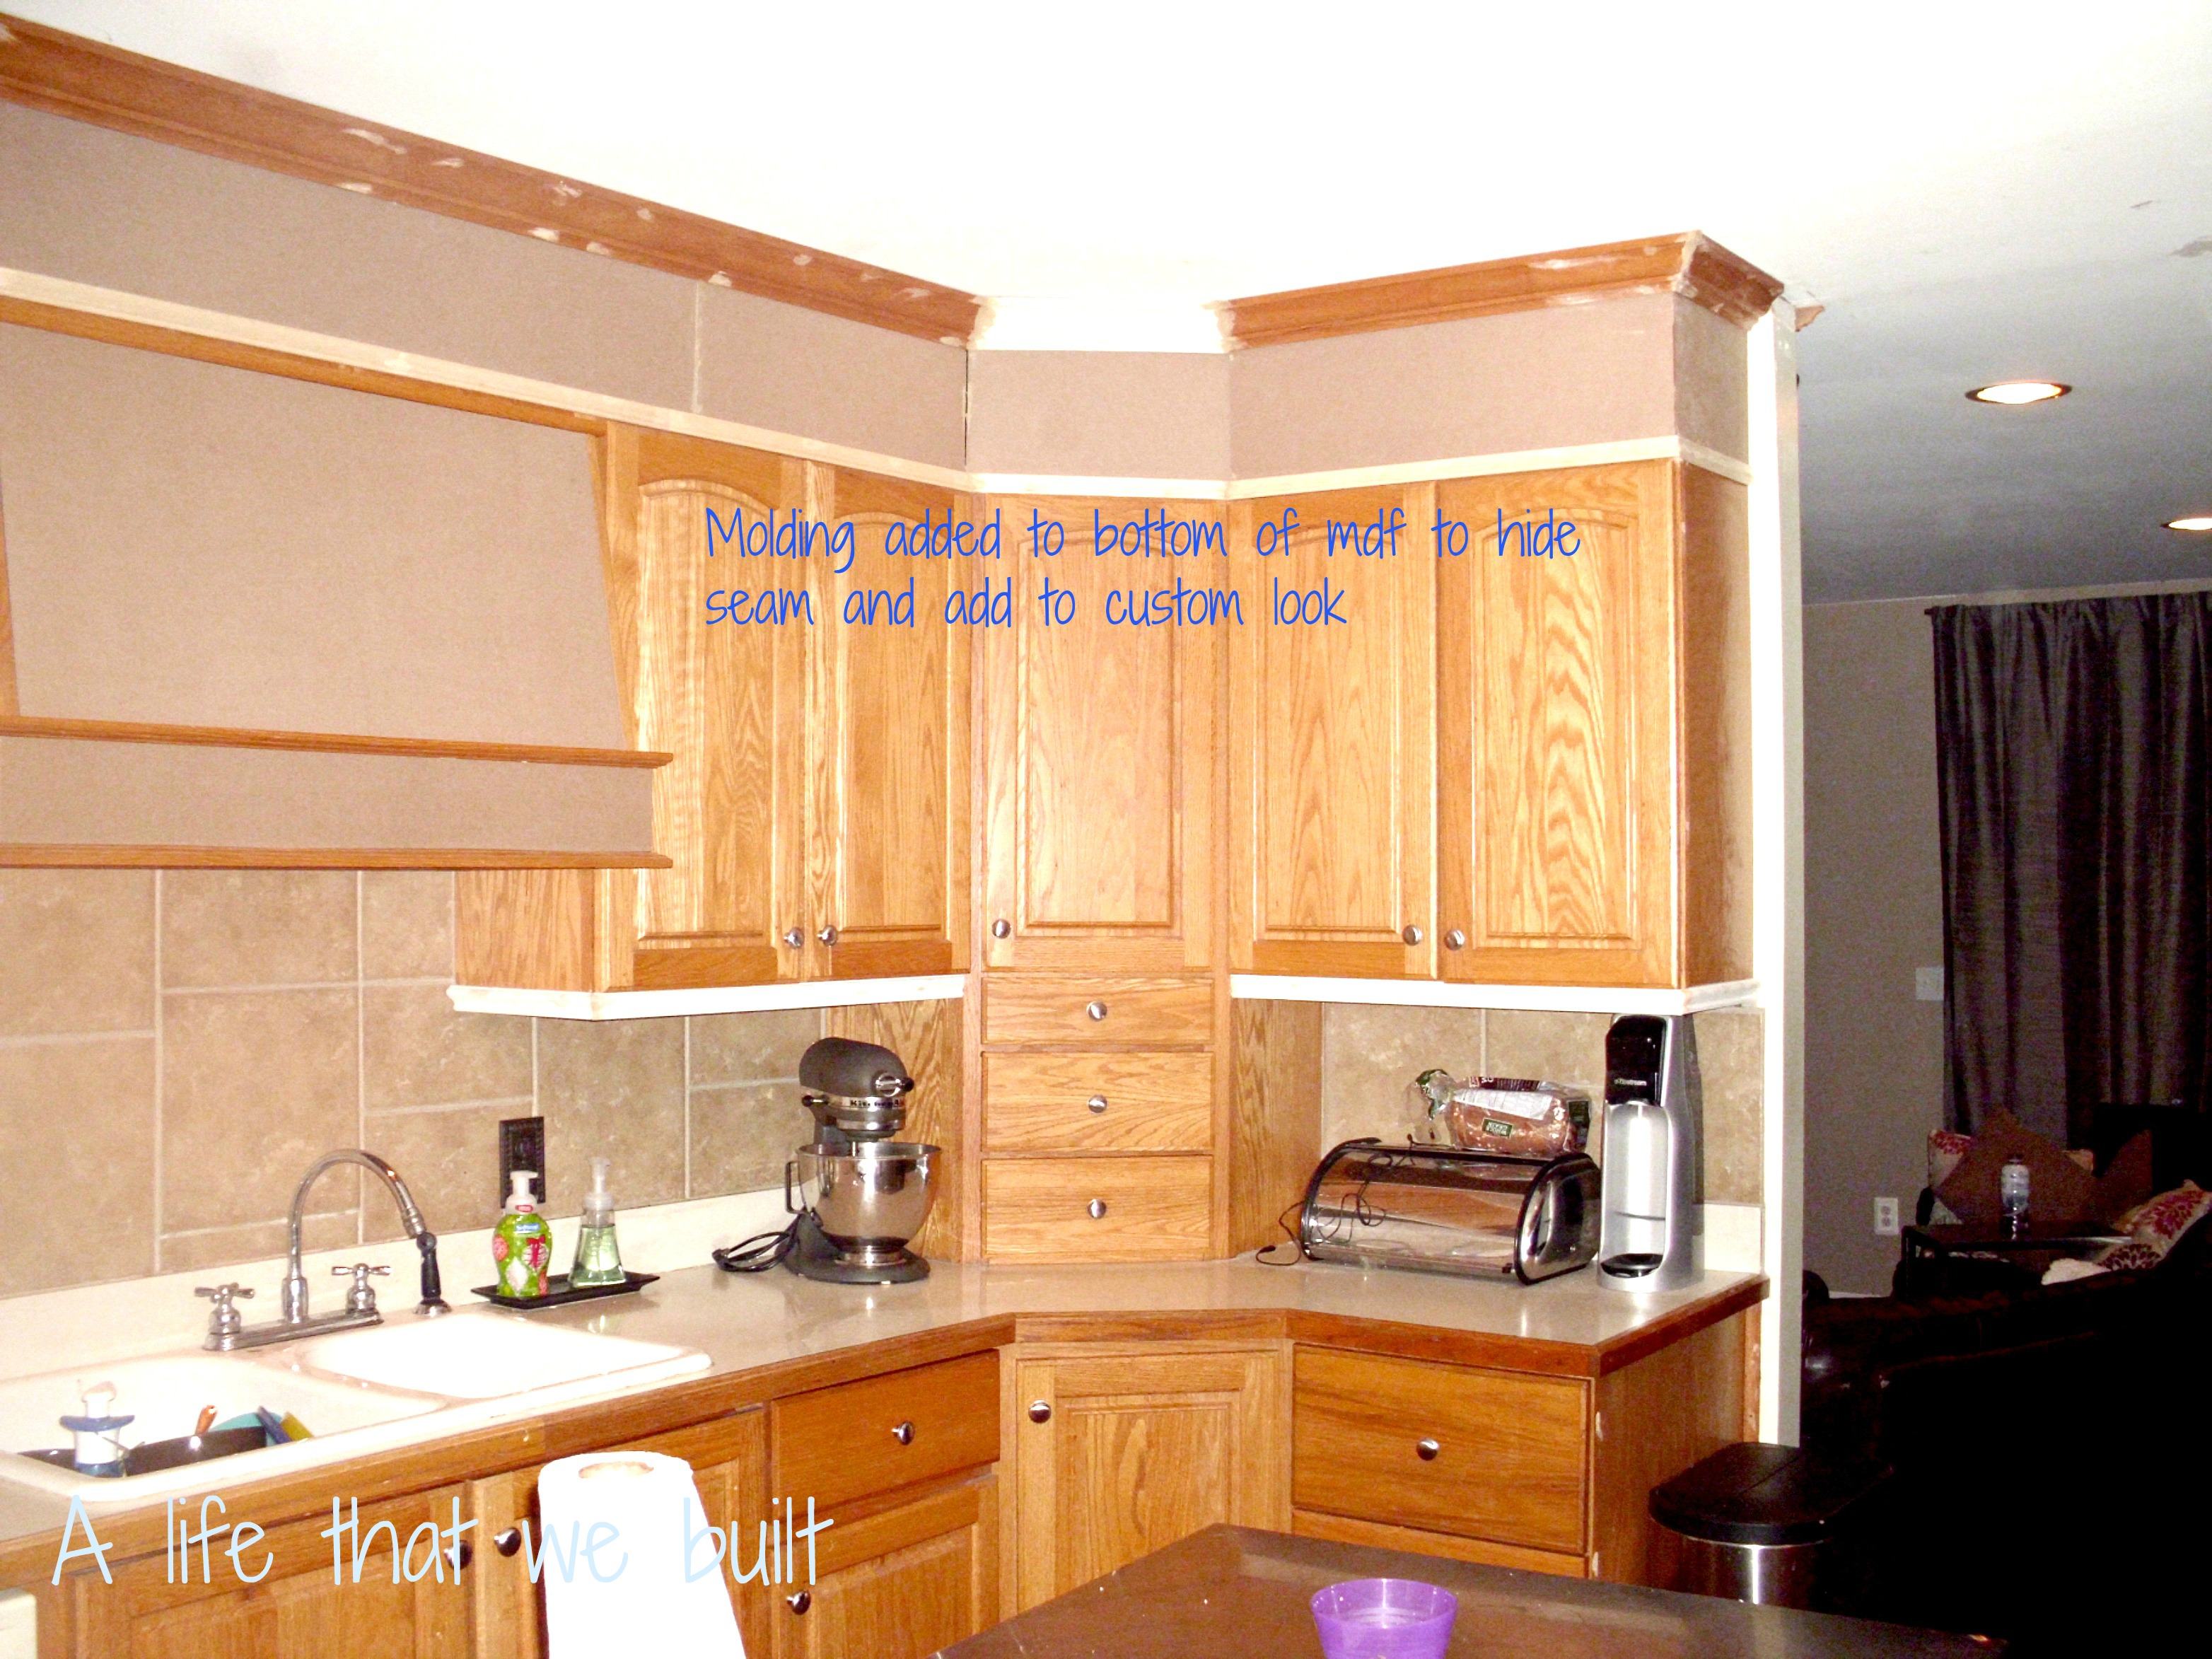
 I played around with my idea and now needed a way to hide the bottom seam of the MDF and cabinet meeting. So I decided I would use a piece of trim to hide it. I also added trim to the bottom of the cabinets because it was going to look so custom on top, why not the bottom?
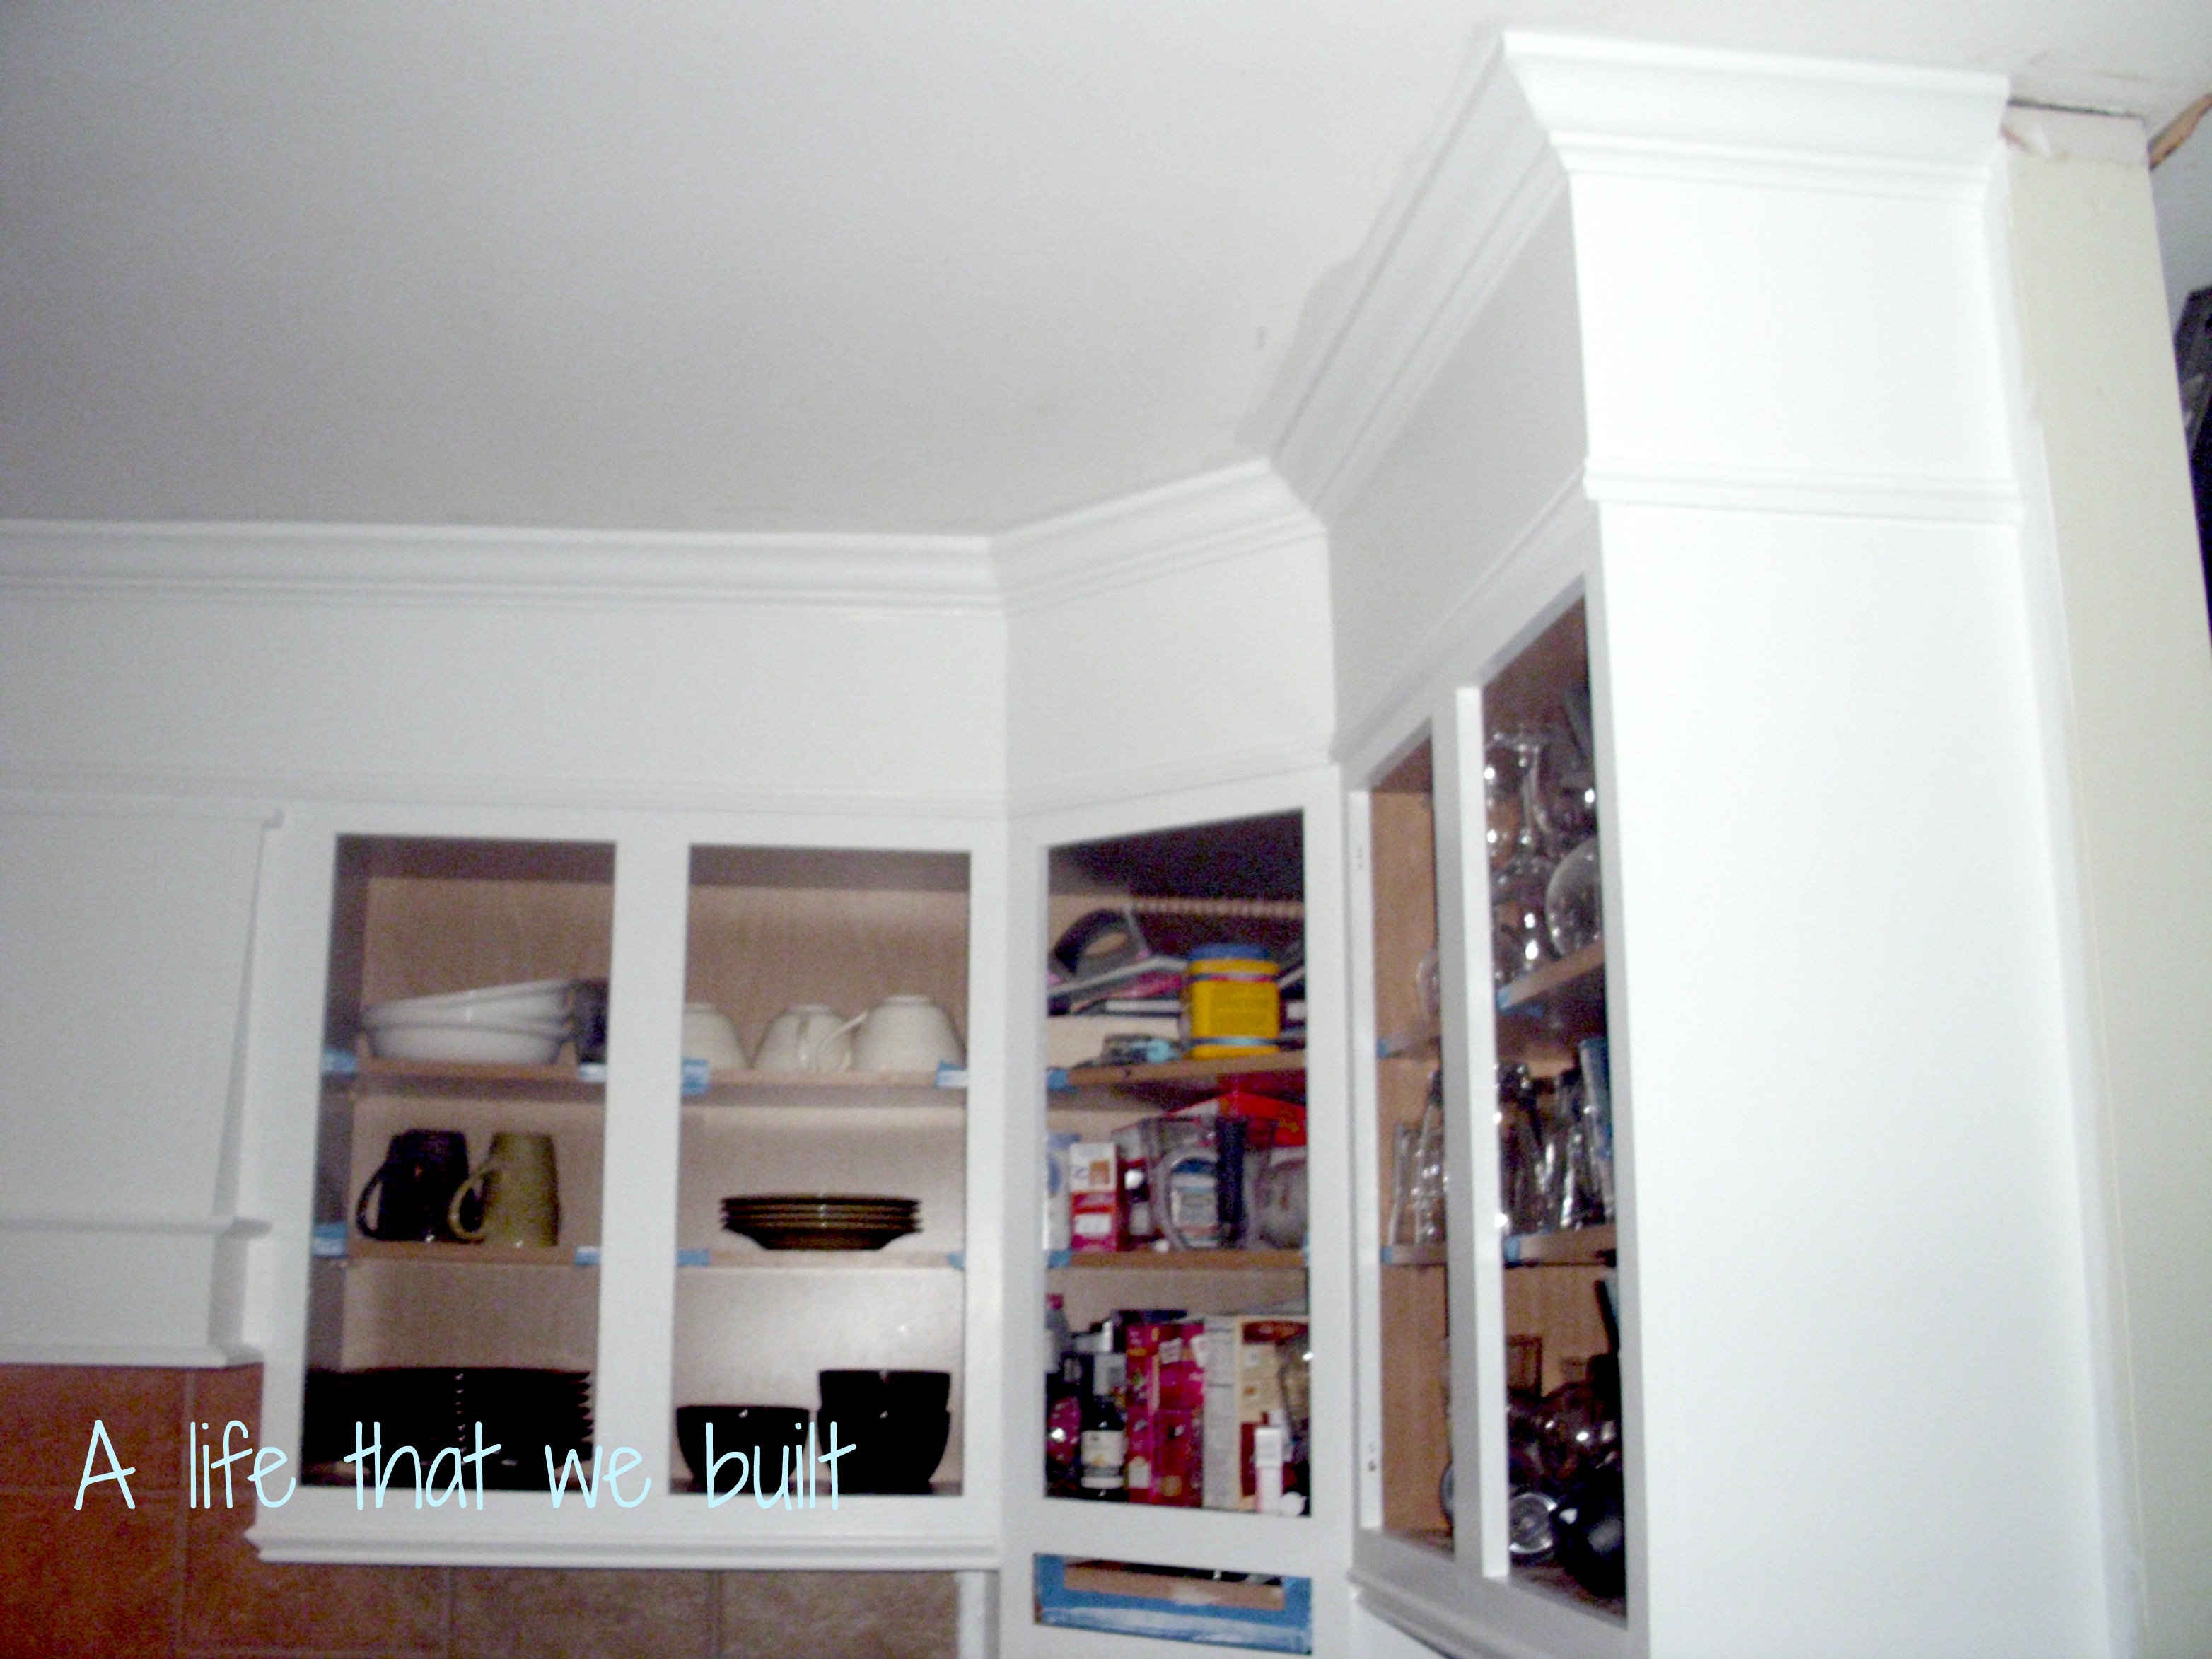
 Seam that needs to be hidden with trim
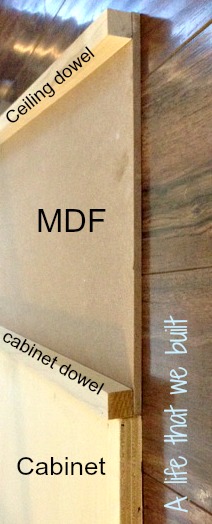
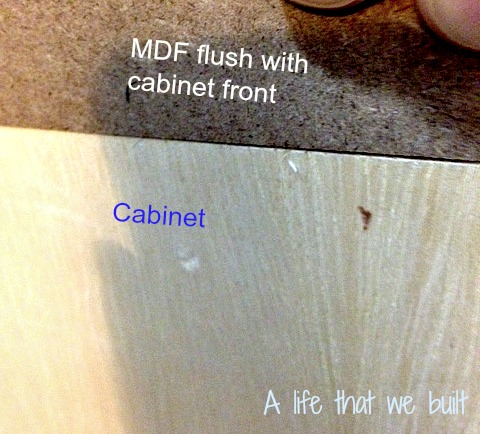
With all the trim pieces picked out, and supplies purchased, I can now start closing the space. I will be using a nail gun to secure the dowels to the ceiling, the upper cabinets, and lower cabinets. When securing the dowels to the upper edge of the cabinets make sure you leave enough space for the material you bought to run flush with the cabinet front. Mine was 1/4″ MDF so I left a 1/4″ of space before I nailed the dowel down.
You want the MDF to be level, so I measured the distance from the wall behind the cabinet to the dowel, and used that measurement to space and secure the dowel to the ceiling above. (I used a stud finder to make sure I was hitting at least one stud in the ceiling per 36″ dowel, you can use a construction adhesive or use anchors and screws depending on your preference).
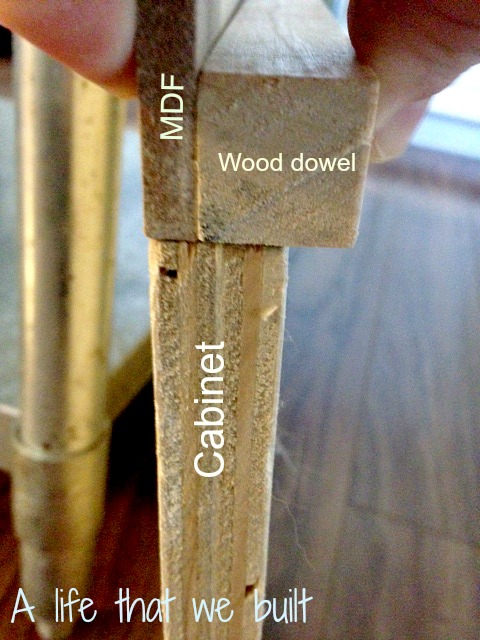
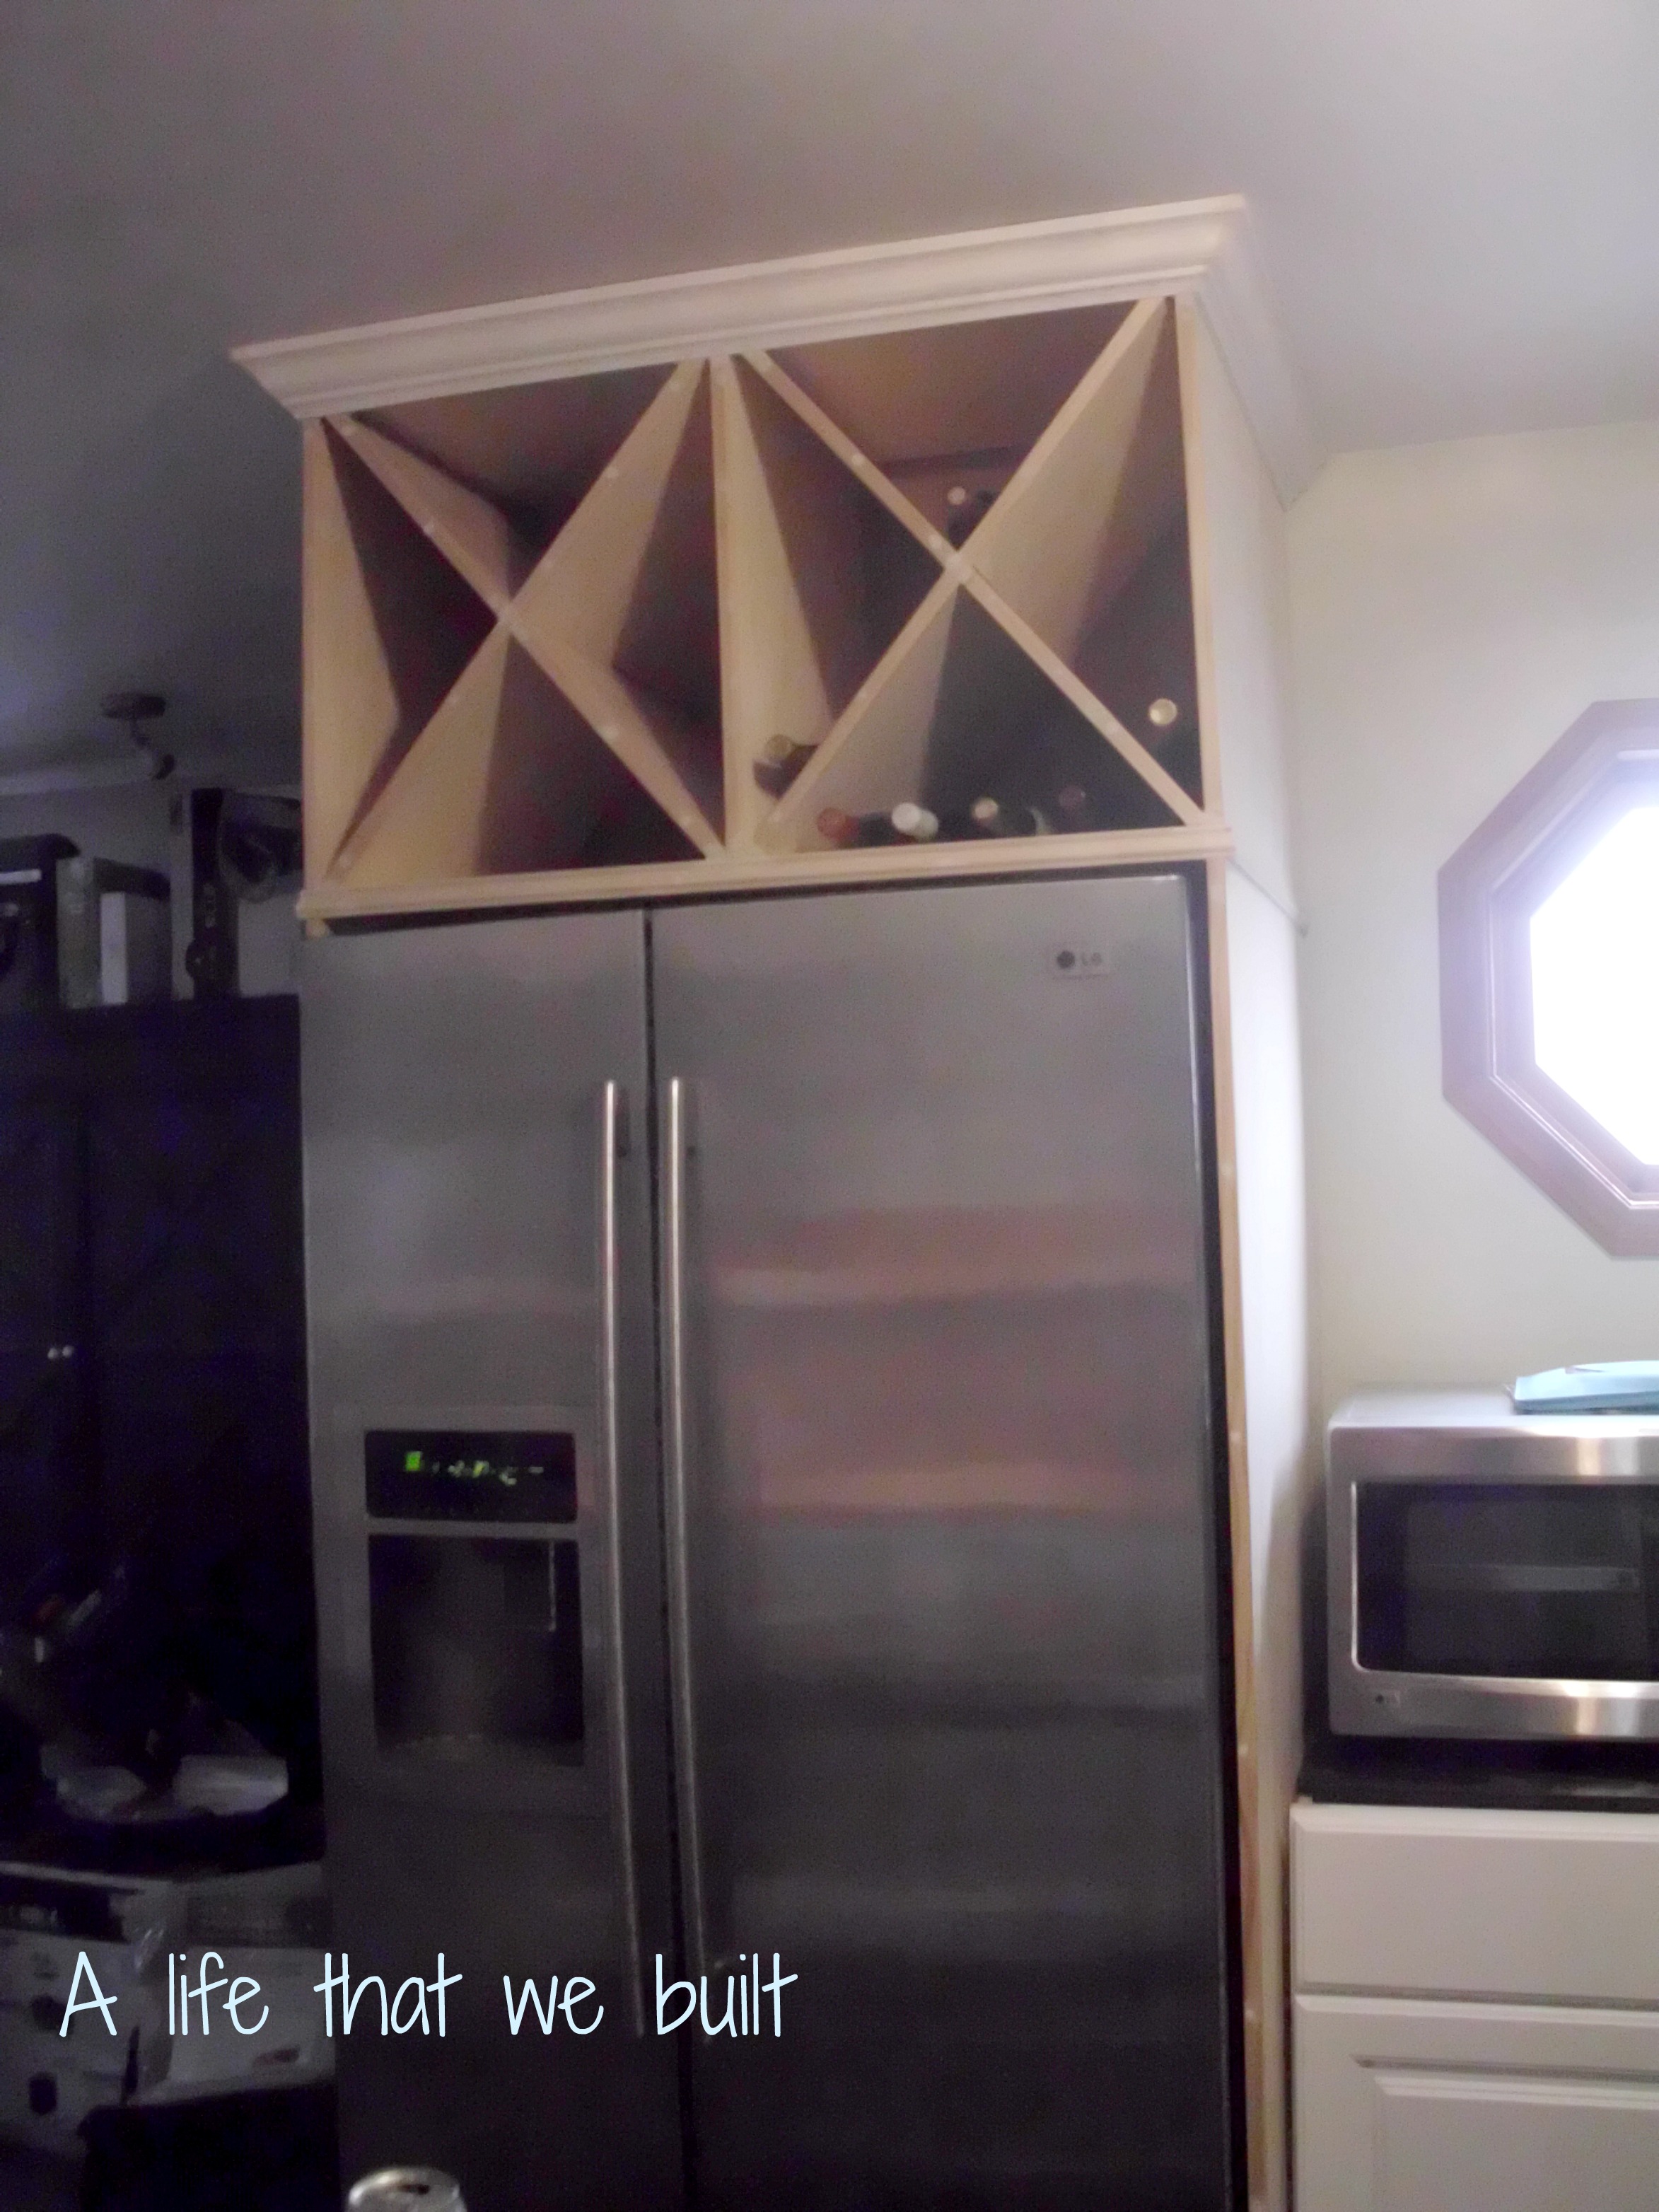
The process of nailing the dowels to the cabinets was very fast, The measurements of the dowels depend on your cabinets. They do not have to cover the whole top edge of cabinets or ceiling, just enough to secure the MDF. Nailing the dowels to the bottom of the cabinets is the same process except I nailed the dowel flush to the bottom edge. The trim I picked for the bottom of the cabinets looked better with the dowel flush. Whichever trim you pick, just play around with the pieces and then alter it how you like. (You will see MDF covering a hood over the sink. This hood had a country scroll to it and beadboard on the top so I used the 1/4″ MDF to cover the hood to make it more modern). After the dowels were in place I used the nail gun to secure the MDF (which I cut to fit with a circular saw) and added the bottom trim.

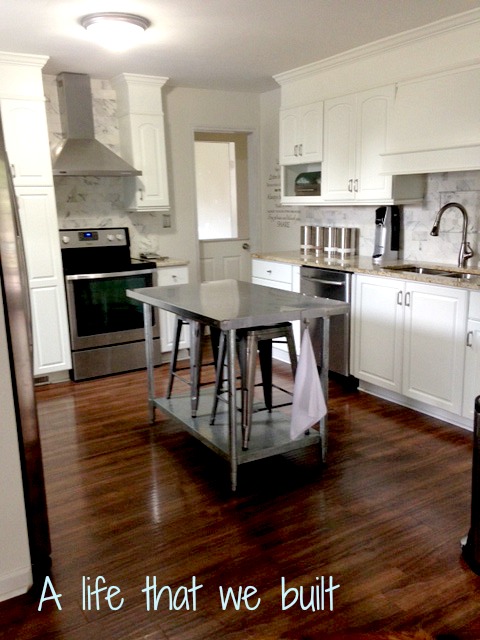
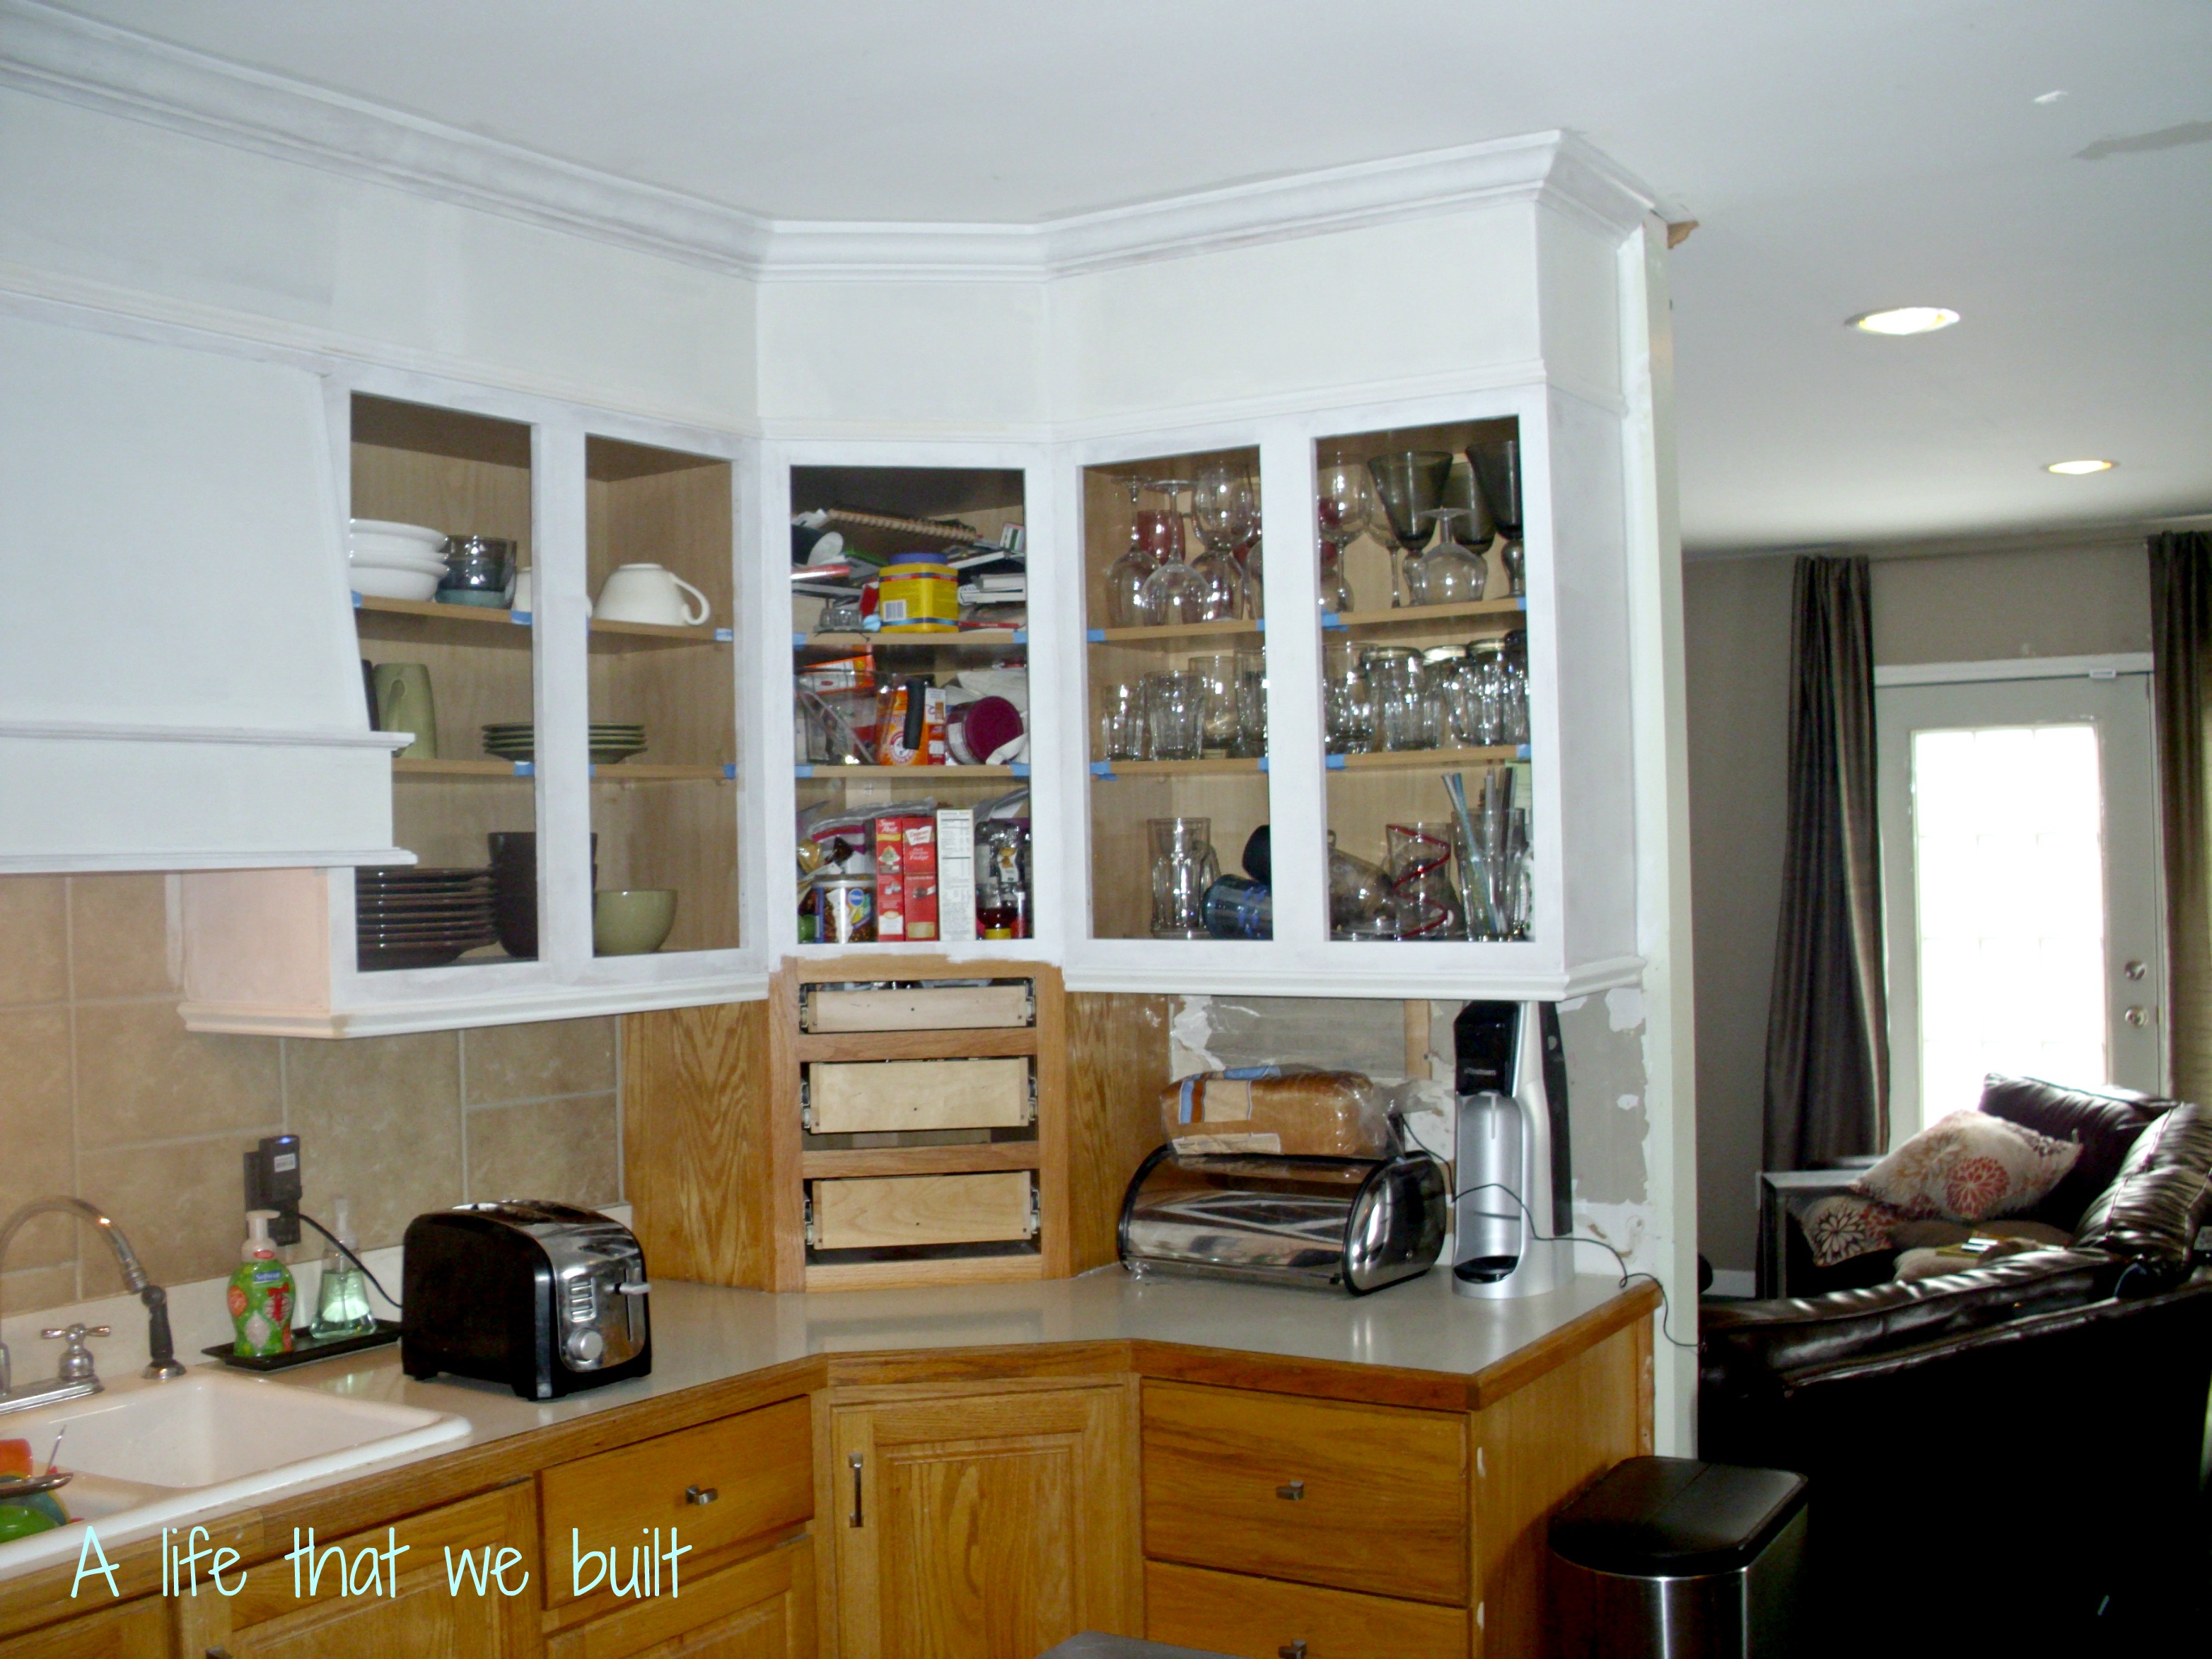
After all the MDF and trim was installed, I filled in all the holes with paintable wood filler, and caulked all the seams with painters caulk. I sanded a bit when the wood filler was dry and then it was ready to paint. I choose not to repaint the inside of the cabinets because the stock cabinets I added had the same color inside as the old ones. I choose to use Cabinet Coat by Benjamin Moore that I bought at Home Depot. I wanted the color of the kitchen to be white anyhow and this paint had good reviews. I did wash the cabinets first and primed with a tannin bleed primer. Then I used a foam roller and brush to paint the cabinet fronts and doors. The paint went on well and dried with no brush strokes. It had a hard coat, and after six months with two boys, a husband, and a dog, has been really durable. We ended up adding a granite countertop and I put in a new floor to finish the overall kitchen remodel. I love the way the cabinets look now that the space above is gone and it has a clean modern look!
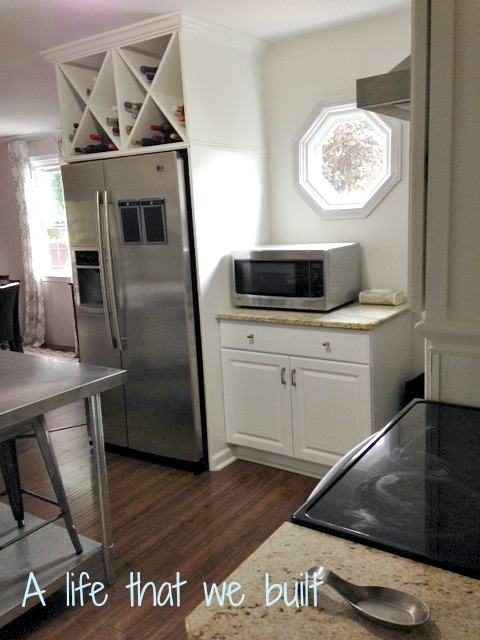
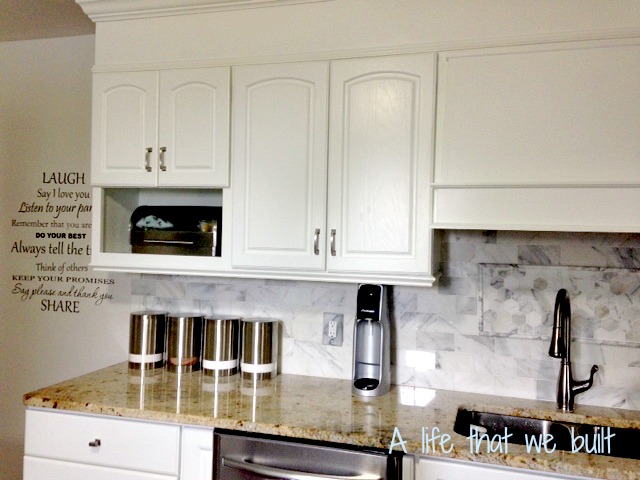
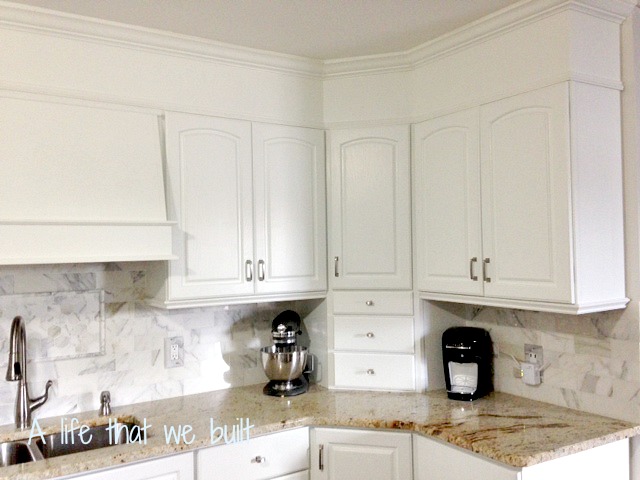
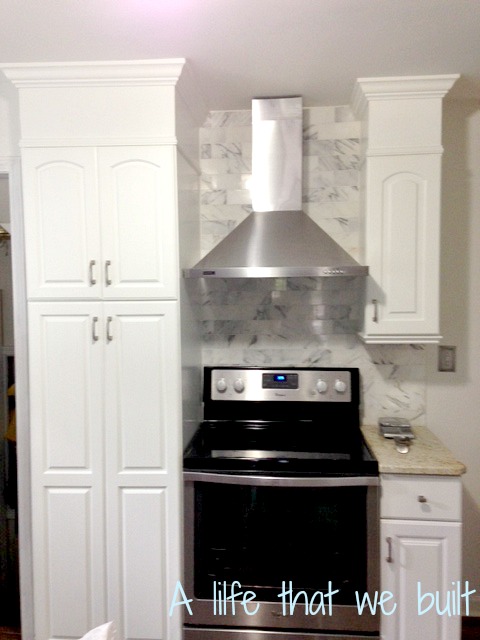
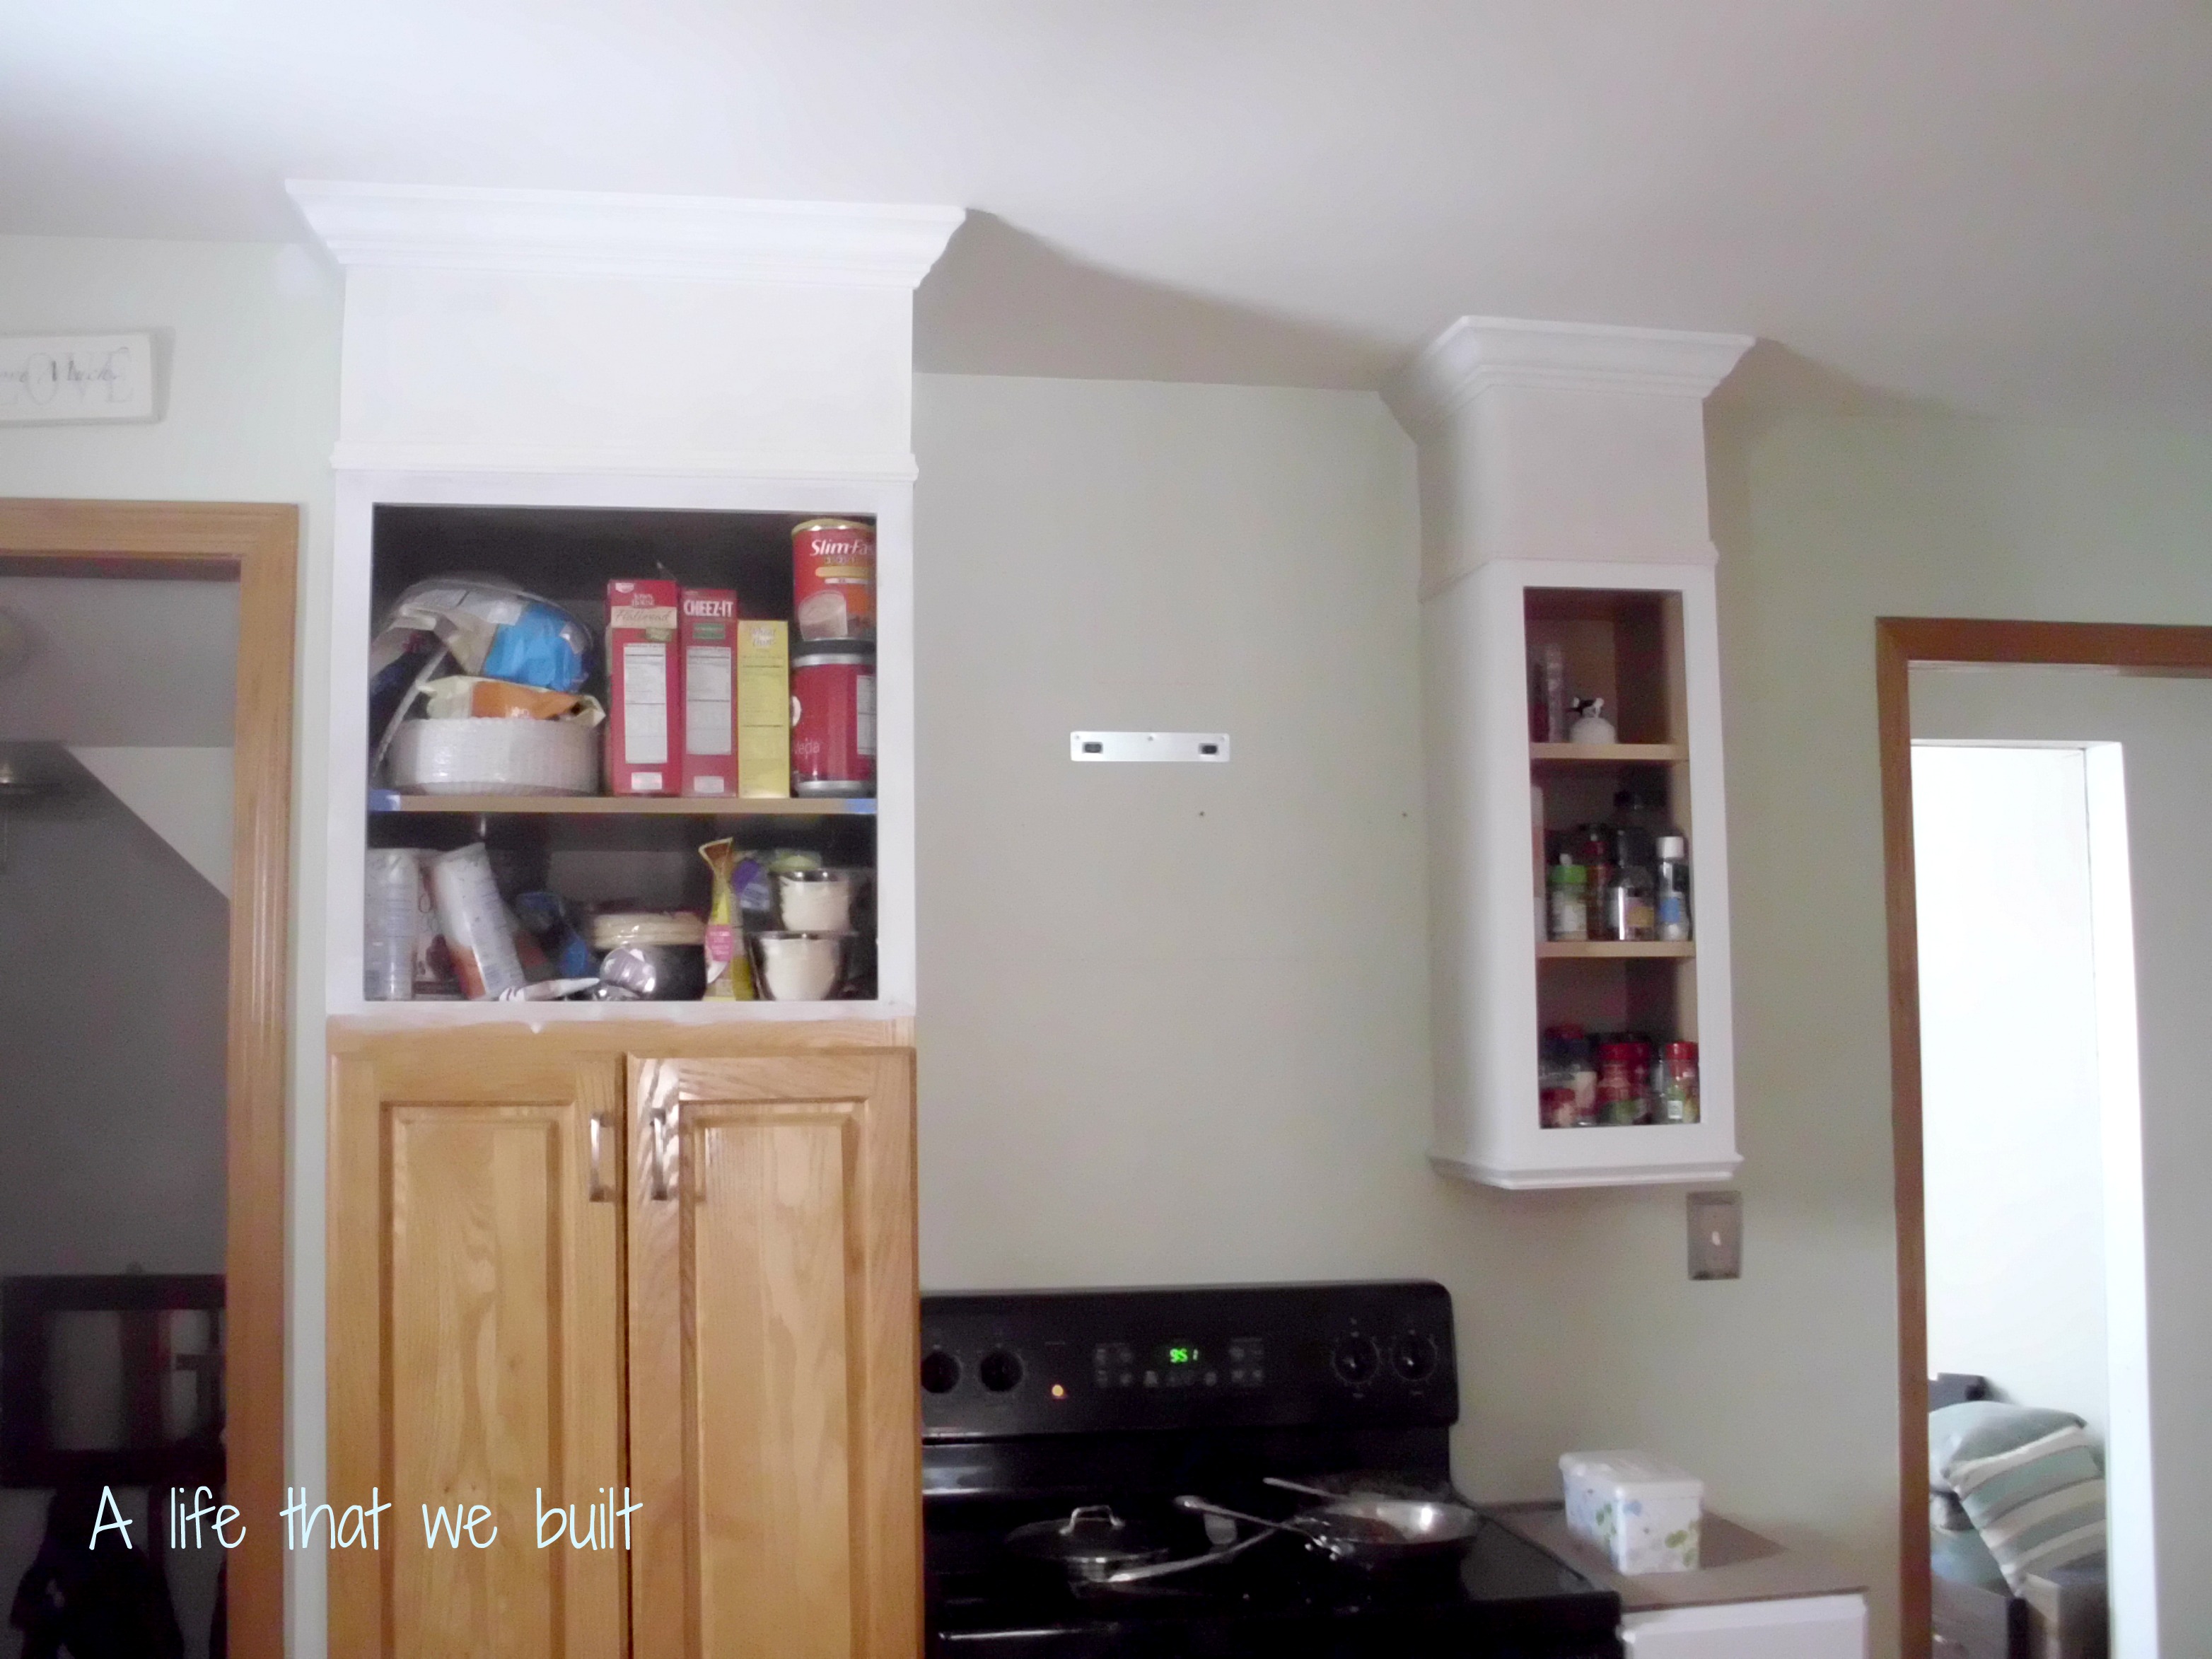
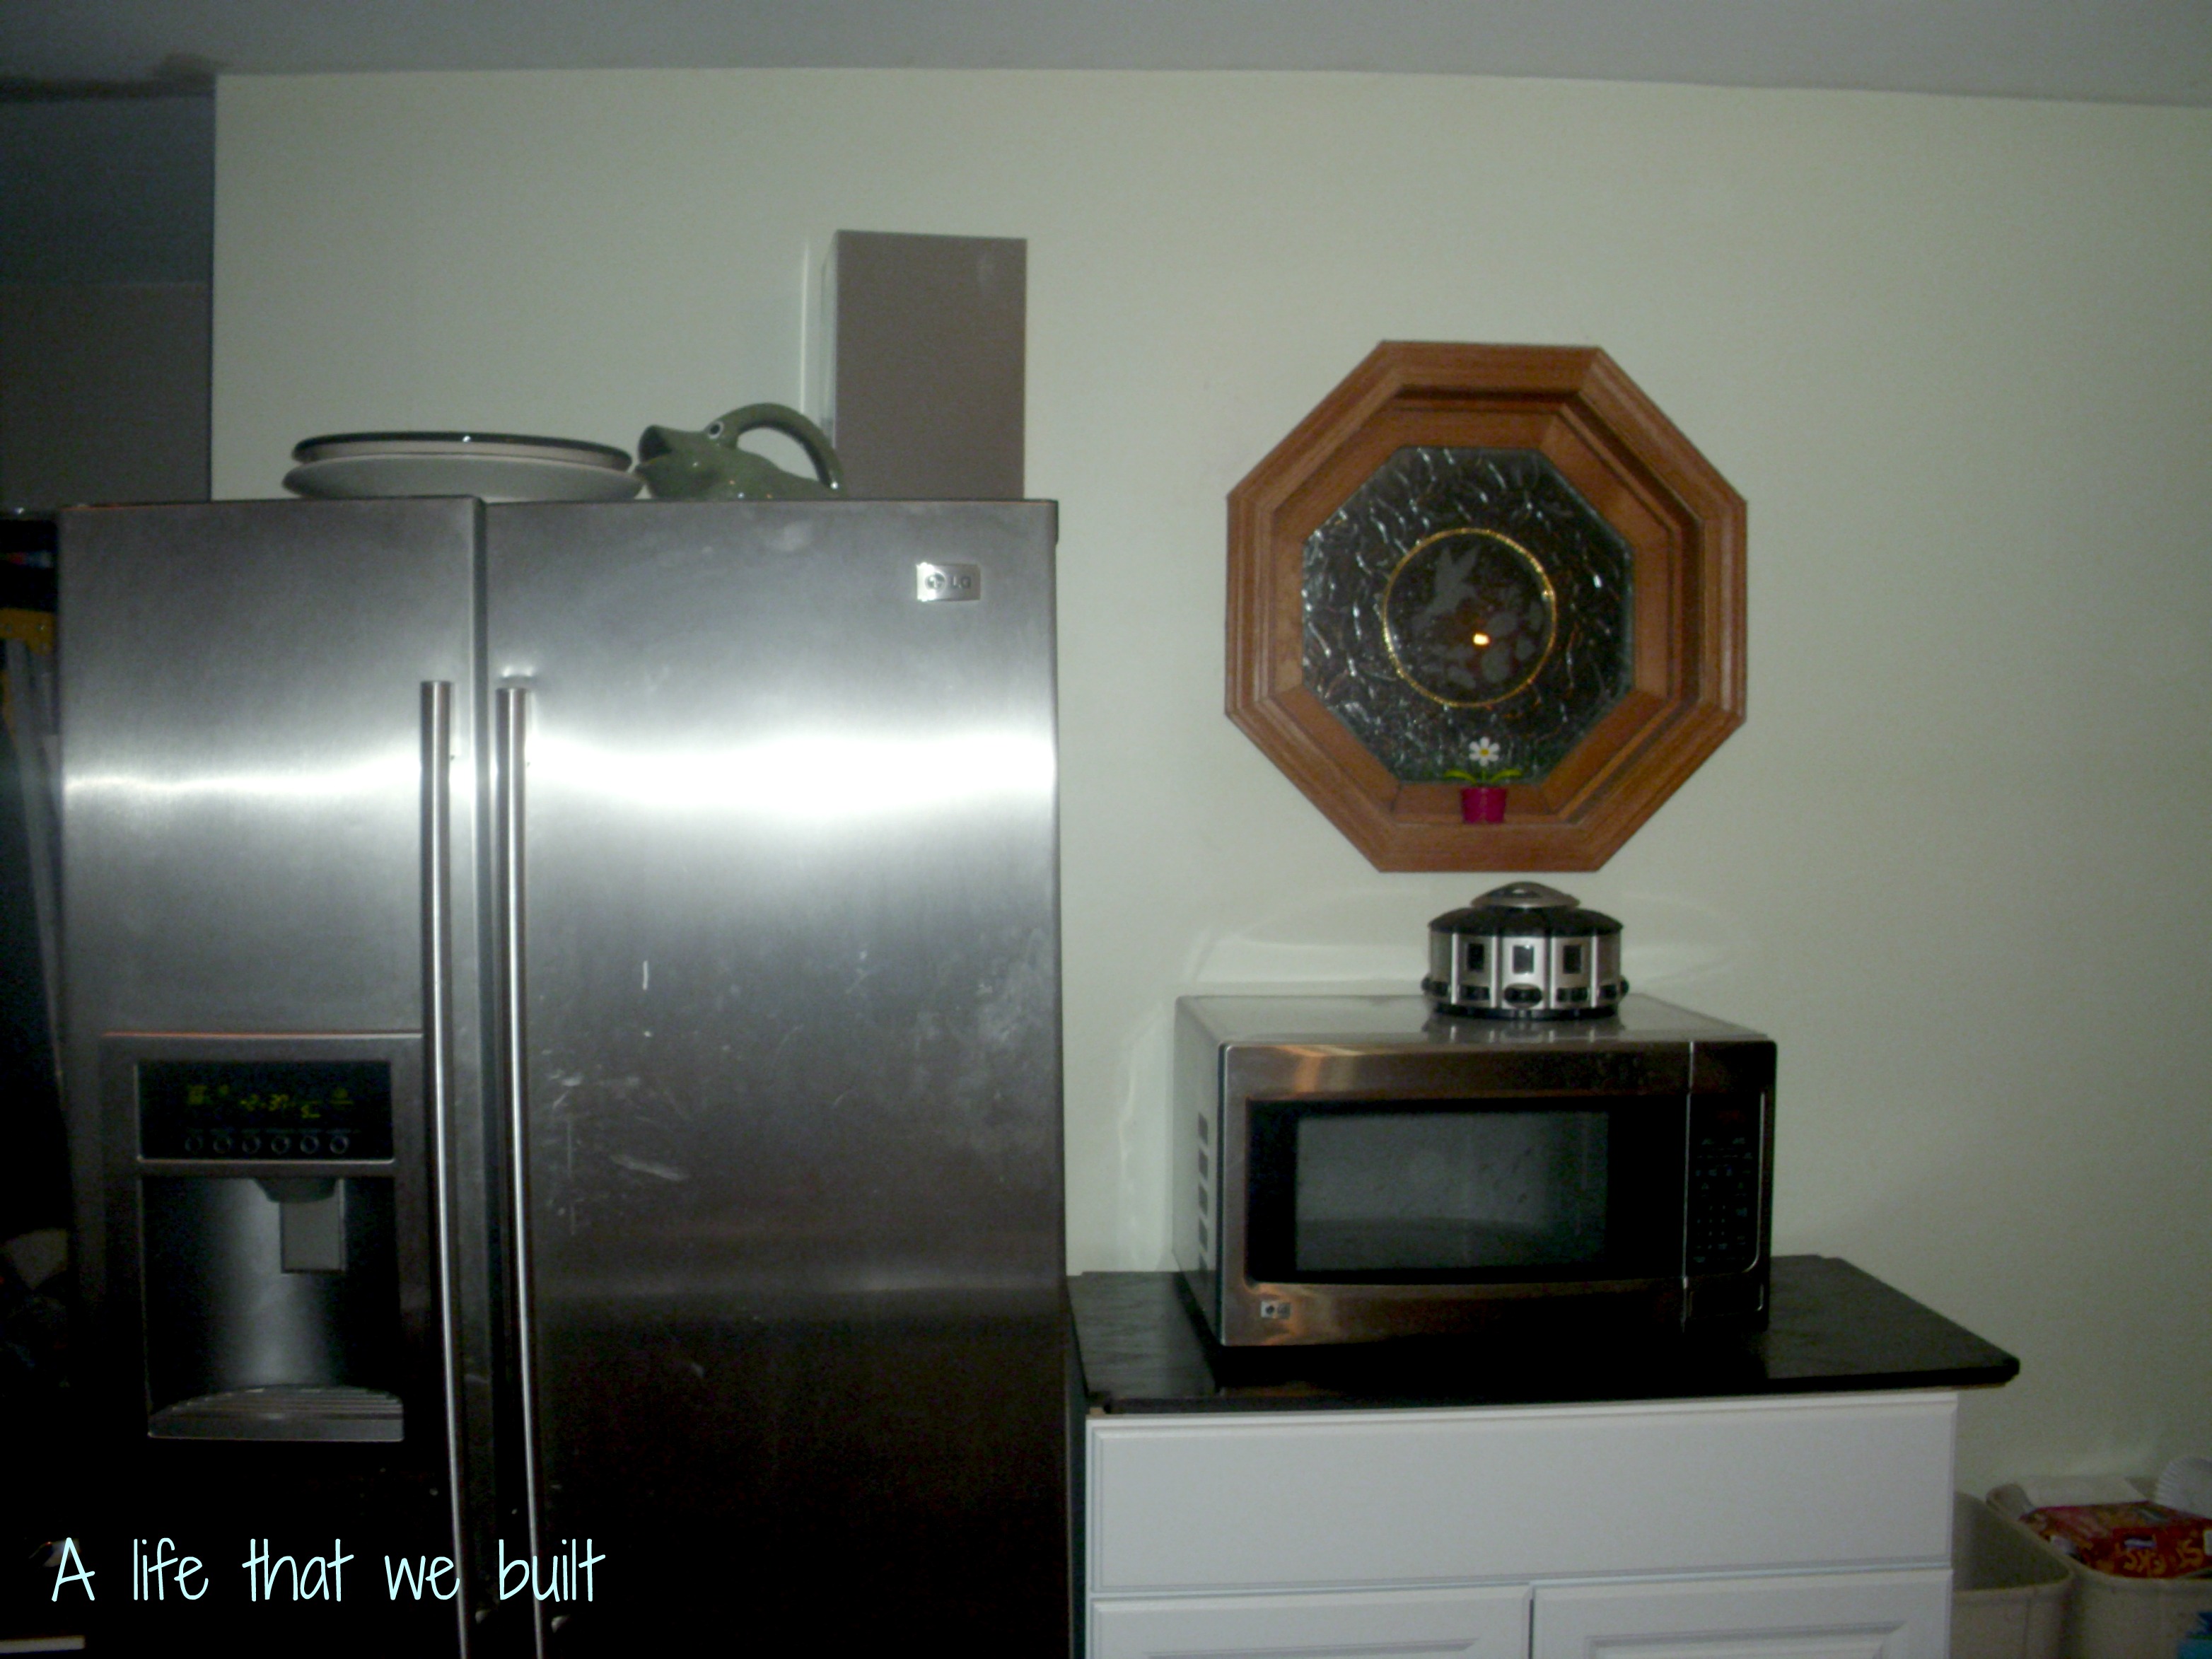
(There are some things you will notice about the kitchen when looking at the pictures I probably have not mentioned. I used the old crown molding that was on the cabinets and moved it up to the top of the MDF, you can add crown to yours as well, or use your existing crown. I also added some stock cabinets that we did not have next to the oven and the refrigerator. Lastly, I built my own refrigerator cabinet because I was sick of looking at the refrigerator by itself).
 Finished Kitchen