My husband picked up our car after the new tires were put on. When he came home he had the old tires in the back of the car. At first, I was getting ready to be the nagging wife and ask what the heck he was doing. Then he explained there was a cost to dispose of them and he would just do it himself. With my crazy mind the way it is, I told him to hold on, that I can do something with these.
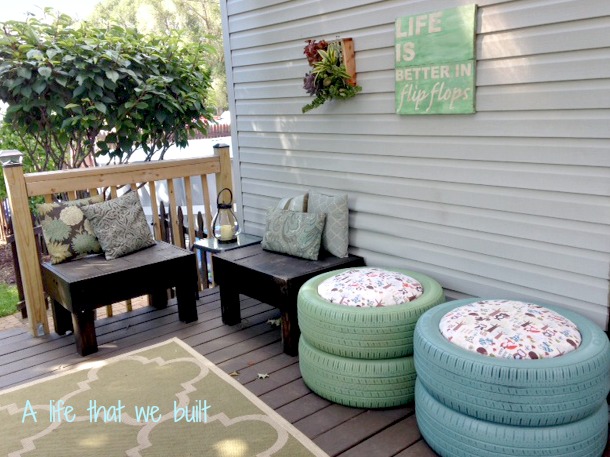
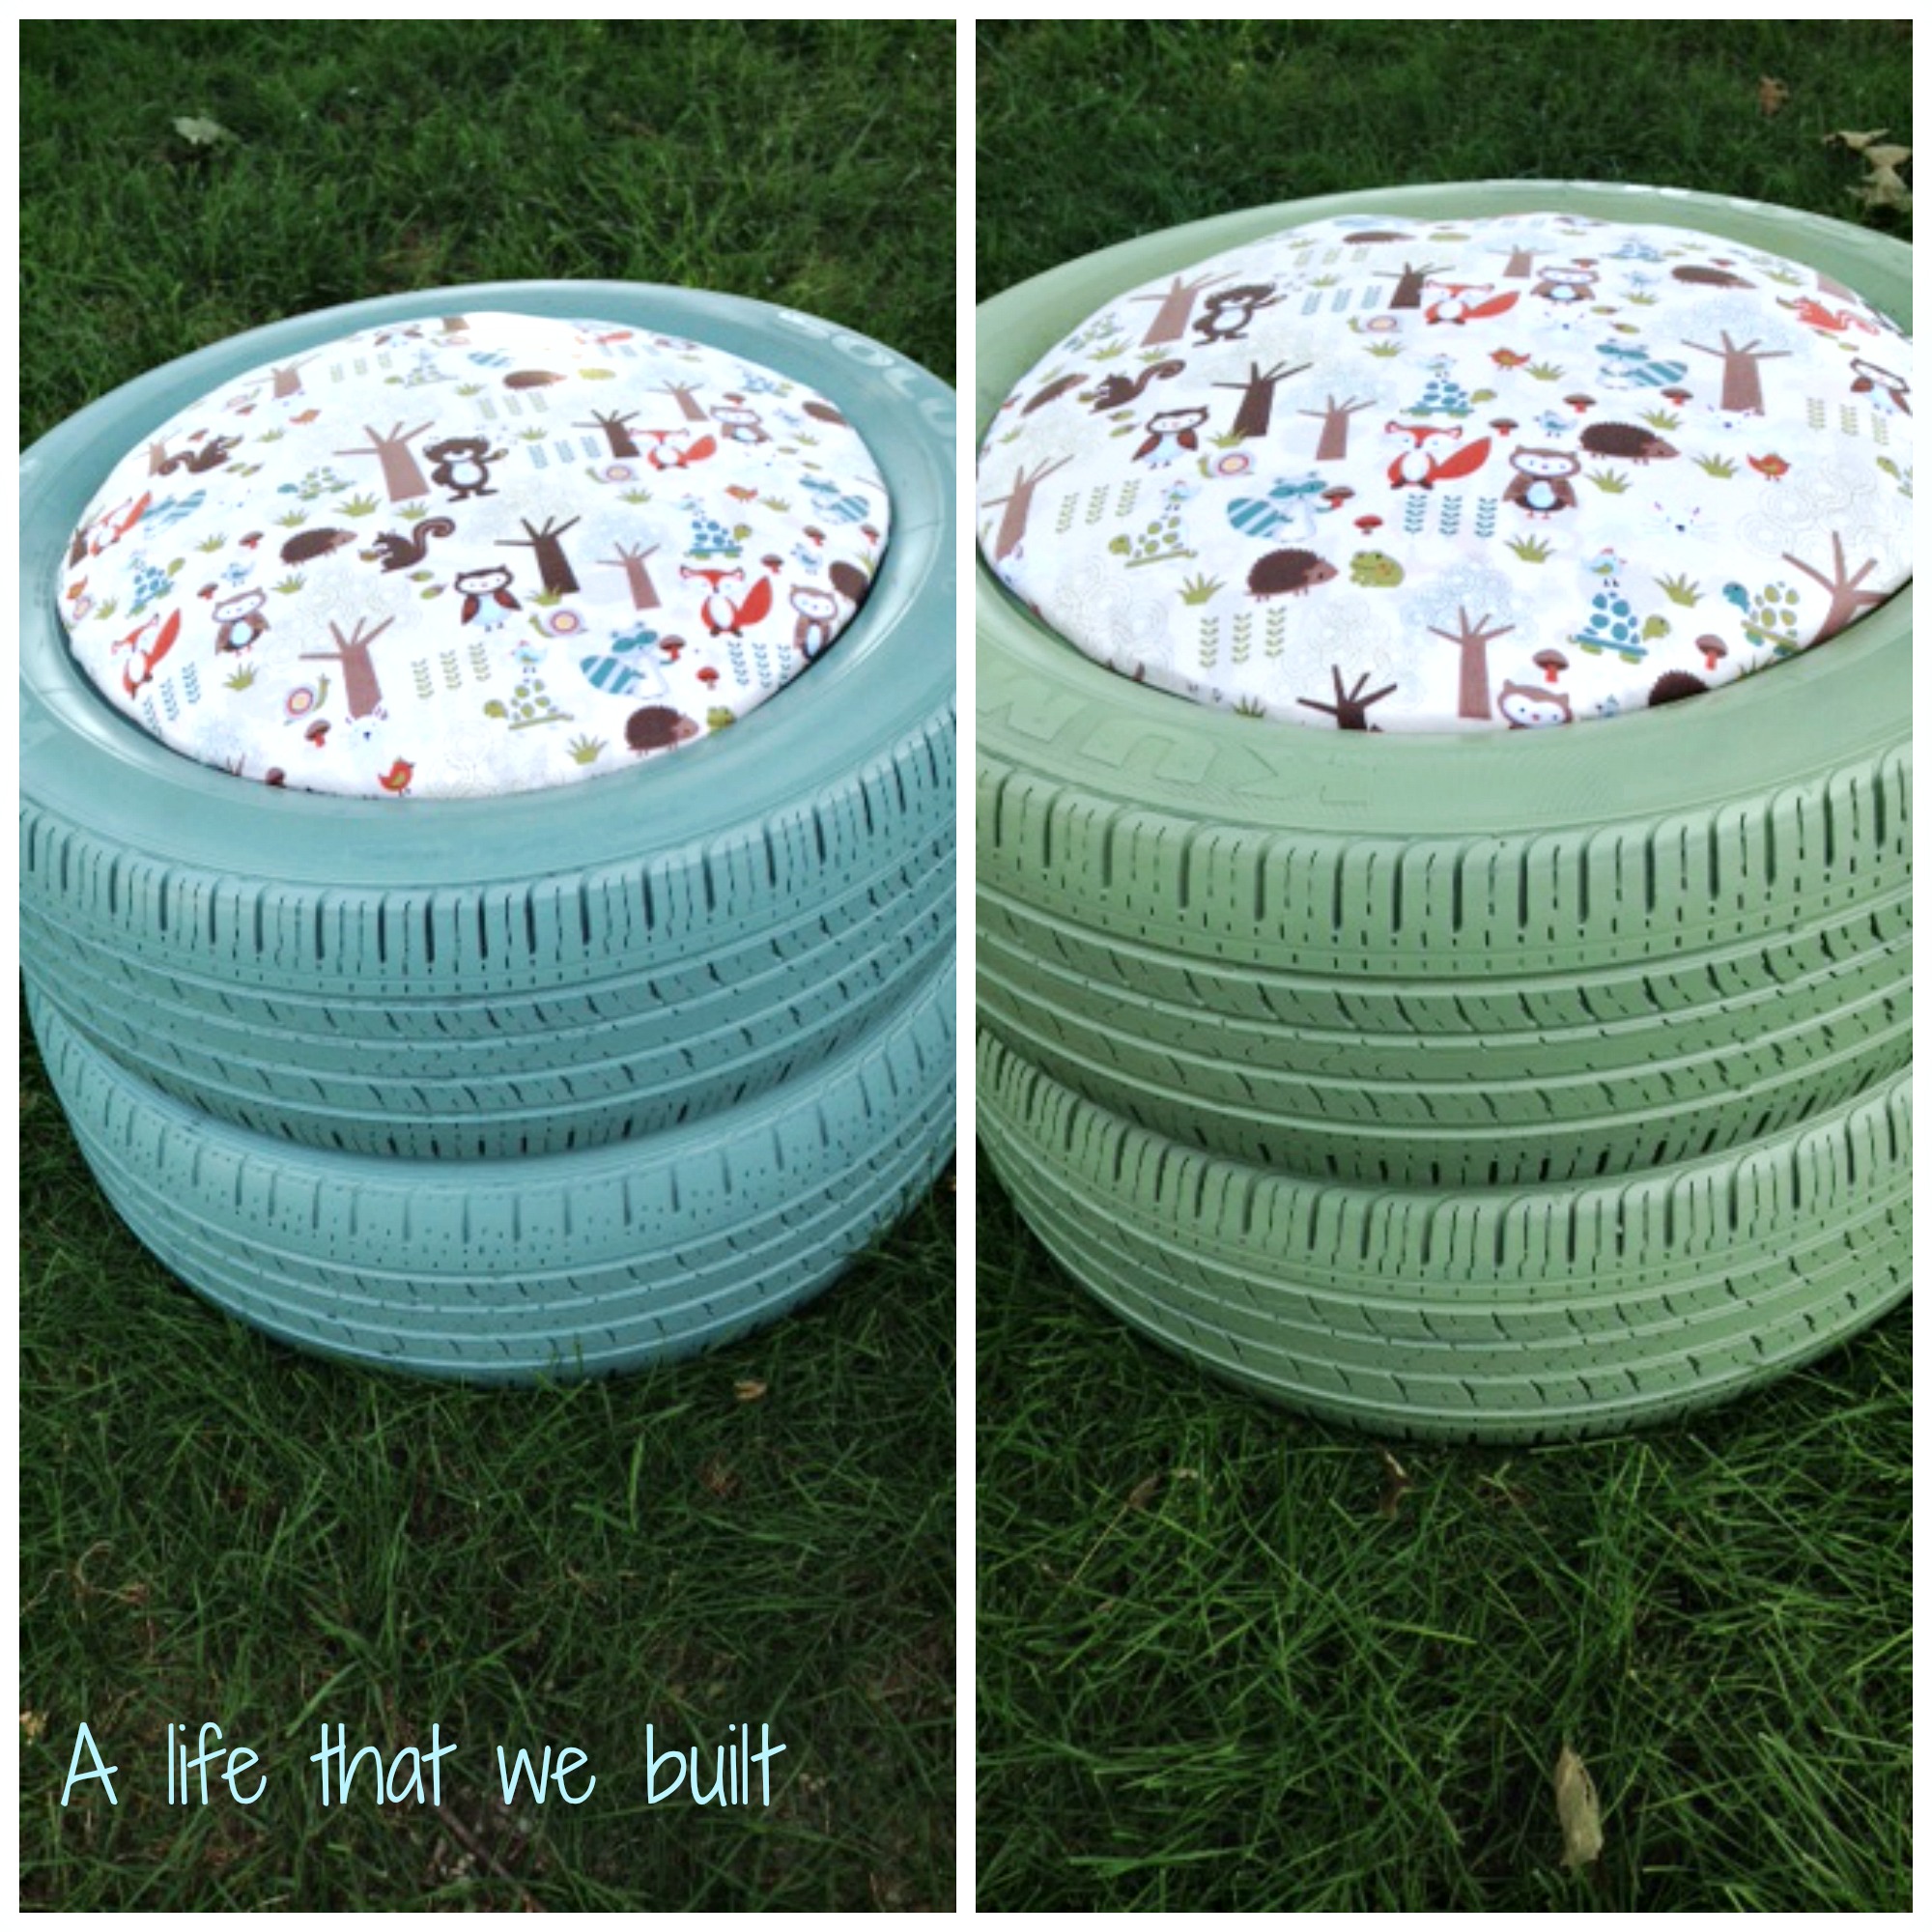
I searched through my Pinterest archives and found a picture of a tire seat. I liked the idea because in our yard we have no designated kids seats. The tires would make the seats very durable and weatherproof. Our boys are 5 and 7 years old so I wanted to make the seats a little larger for them to grow into, so I decided to use two tires stacked on top of each other.
This is how I made the seats:
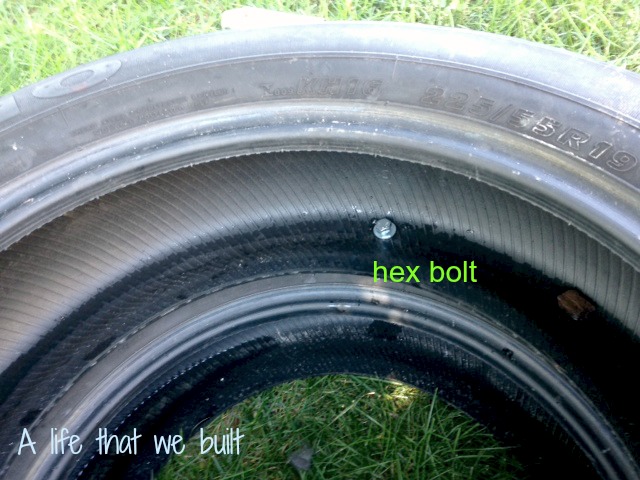
When looking at the tire there is a rim of sorts that if you made a round top you can set it into the top so it sits on the rim of the rubber, or make your top to go to the outside edge of the tire. I decided to let it sit on the rim of the tire so that I would not have to secure the top because I wanted it removable for toy storage, or hiding in, which is the first thing my son Cole did!
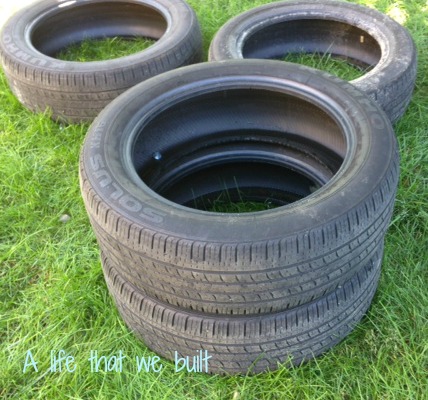
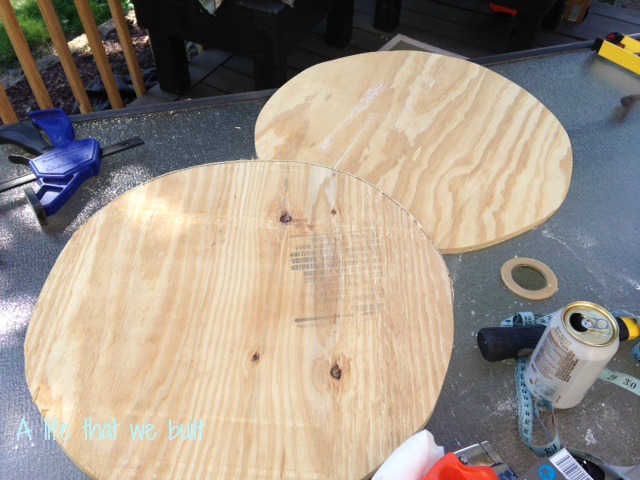
I measured the distance across so I would know the amount of plywood I would need for the seat base. These tires were 20″ across.
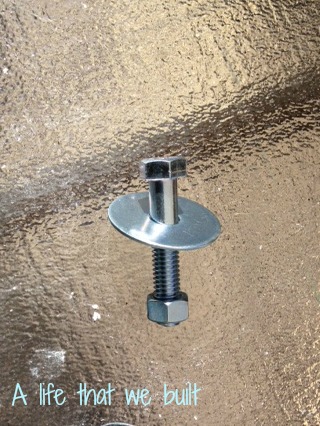
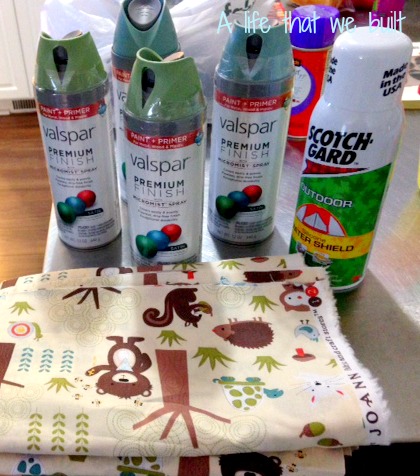
I made a trip to Lowes and bought outdoor treated plywood in a 2x4x1/2″ sheet. I also purchased 2″ hex bolts, washers, and nuts to secure the two tires together. I bought two bolts for each set. I also picked up two cans of spray paint for each set of tires.
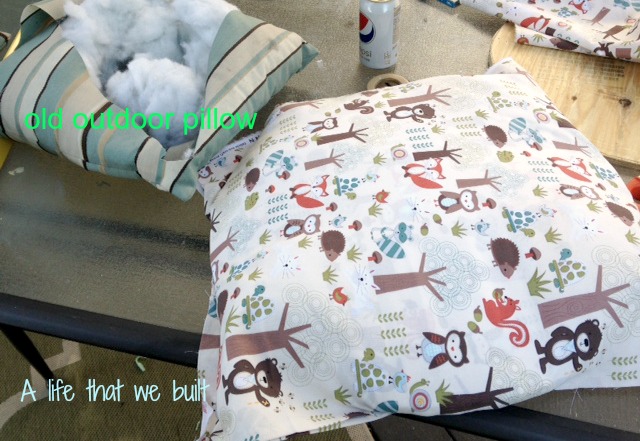
I also went to Joann fabrics and purchased some cheap cotton fabric, and a scotchguard outdoor spray to make the fabric able to withstand the weather. (I could not find an outdoor fabric that I liked). (You will also need some stuffing or foam to use for the cushioned seat. I am using two old outdoor pillows that I will take the stuffiing out of).
I went home and gathered a drill, staple gun, and jigsaw.
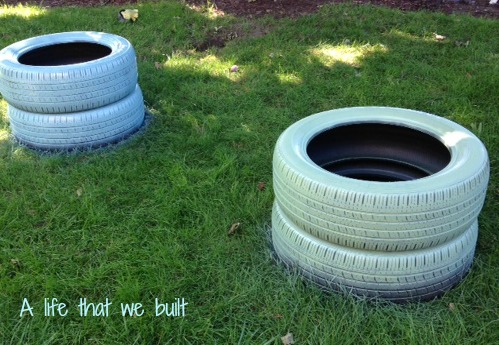
I stacked the tires on top of each other and drilled a hole into the inside edge on each side going down into the second tire as well. Use an appropriate size drill bit for the bolt you purchased. I then used the bolt and nut to secure the two tires together for each seat.
I wiped the tires down and spray painted them. I gave them two coats of spray paint.
 I started working on the seat tops while they were drying. I drew two 20″ circles on the plywood and cut them with the jigsaw. (They were not perfect! It was my first time with a jigsaw)
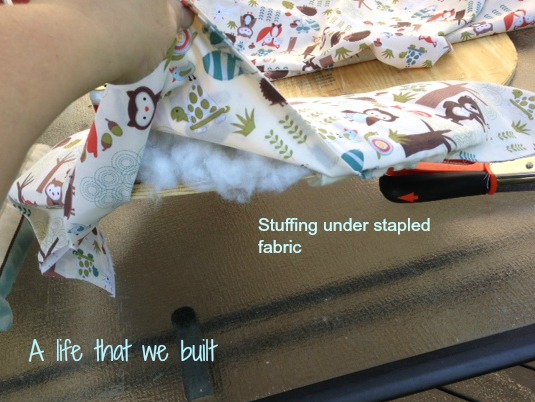
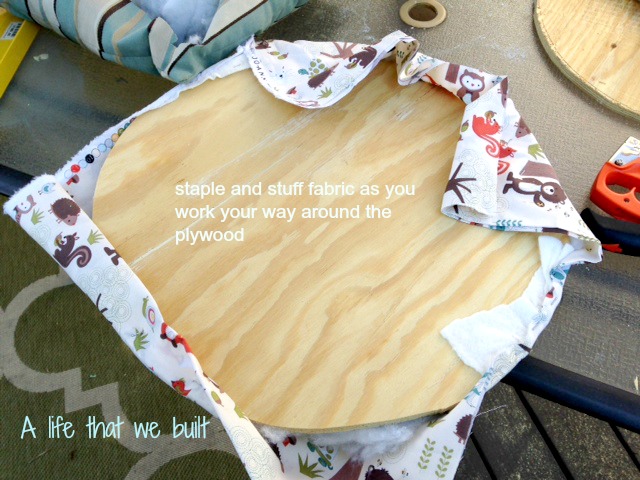
I then cut the fabric so that it would cover the circles with at least 2″ of overlap at the bottom of the plywood. You need some extra to secure it with staples and for the stuffing/foam. I cut open my old outdoor pillows to get the stuffing and put some under the fabric. I stapled one staple on each side of the circle and continued to stuff and staple all around the edge of the plywood pulling the fabric tight with each staple.
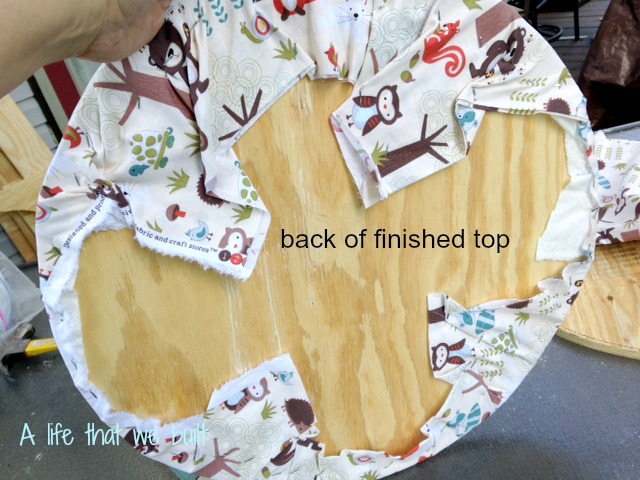
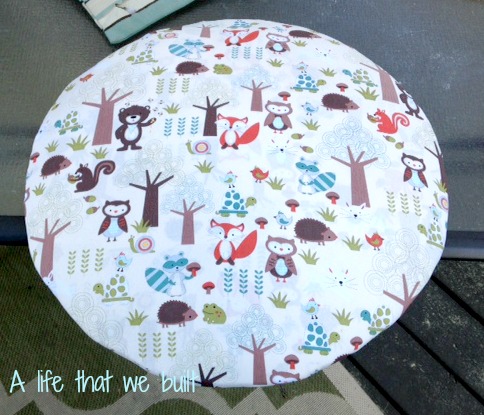
I sprayed the tops with the scotchguard for outdoors and waited for it to dry. Its all done. It’s that easy! the top is finished, and with the paint on the tires dry, I set the top onto the tires and now we have two new tire seats for the kids! The top is removable for storage or in our case for the kids to climb in!
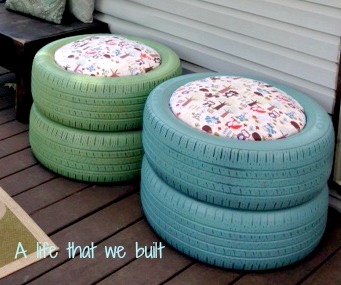
How did these hold up? I’m thinking of making some to go around our fire pit and sit by our pond.
They have been great so far! I did cover them with a tarp for the michigan winter. I moved them around many times in the summer and used them to store loose toys in the yard with no issues. Around a fire pit is a great idea! Good luck!
Thanks so much , I Will try that this week ! I have 8 spare tire ! Thanks ! They are pretty !
2 years later, how are they holding up? I’m in the tropics with salty air.
We are in michigan with the winter weather the tire part has been great! The top I did redo the fabric to actual outdoor fabric and it has been much better than using regular fabric with the outdoor spray but it was an easy fix, just pulled up the staples and re-stapled the new fabric back on…..
Did you put a round piece of plywood on the bottom too? Or just the top? I always felt like the tire seats would be bouncy and the weight of the person would make it kind of cave in? no?
I did not put a piece on the bottom. The plywood sitting inside the top of the soft edges has given it enough support but might depend on the tire??? I do not see why you couldn’t put one at the bottom or even one in the middle of the two tires for more support if you are worried about it, it would definitely make it more sturdy!! You could also take the plywood edge all the way to the edge of the tire so that you have more support with the hard edges of the tire!
Great presentation and good job. Congrats.
How many spray paint bottles or how much quantity (in millilitre) spray paint liquid is needed for 2 tyres?
I bought two cans of spray paint for each tire seat. I used about 1.5 cans which left me some for touch ups the next year!
How much fabric did you use for each tire seat?
Hi, the circles I used were 20″ with about 2″ of overlap so it was under one yard each about 2 feet each depending on the size circle you will use!
What type of paint did you use? Did you degrease the tires first before painting?
Thanks!
I just used the valspar spray paint from Lowes I did not do anything to the tires before hand except rinse them off with a hose and let them dry.